MongoDB is an open-source NoSQL database management system that provides a flexible, document-oriented approach to storing and retrieving data. It is designed to handle unstructured or semi-structured data and is widely used for building scalable and high-performance applications.
Authorize the Connection to MongoDB
In order to connect MongoDB as a data source, you will need to first authorize the connection to your MongoDB.
Create a MongoDB Data Source
- On the Sources page, click on the Create Source button and select the connector from the list.
- From the drop-down menu, choose your account.Didn't find your account?
Click on Add new Account at the bottom of the drop-down and follow the on-screen prompts. You can also go to the Authorizers tab and click on Add New Service.
- Name your data source and fill in the following fields:
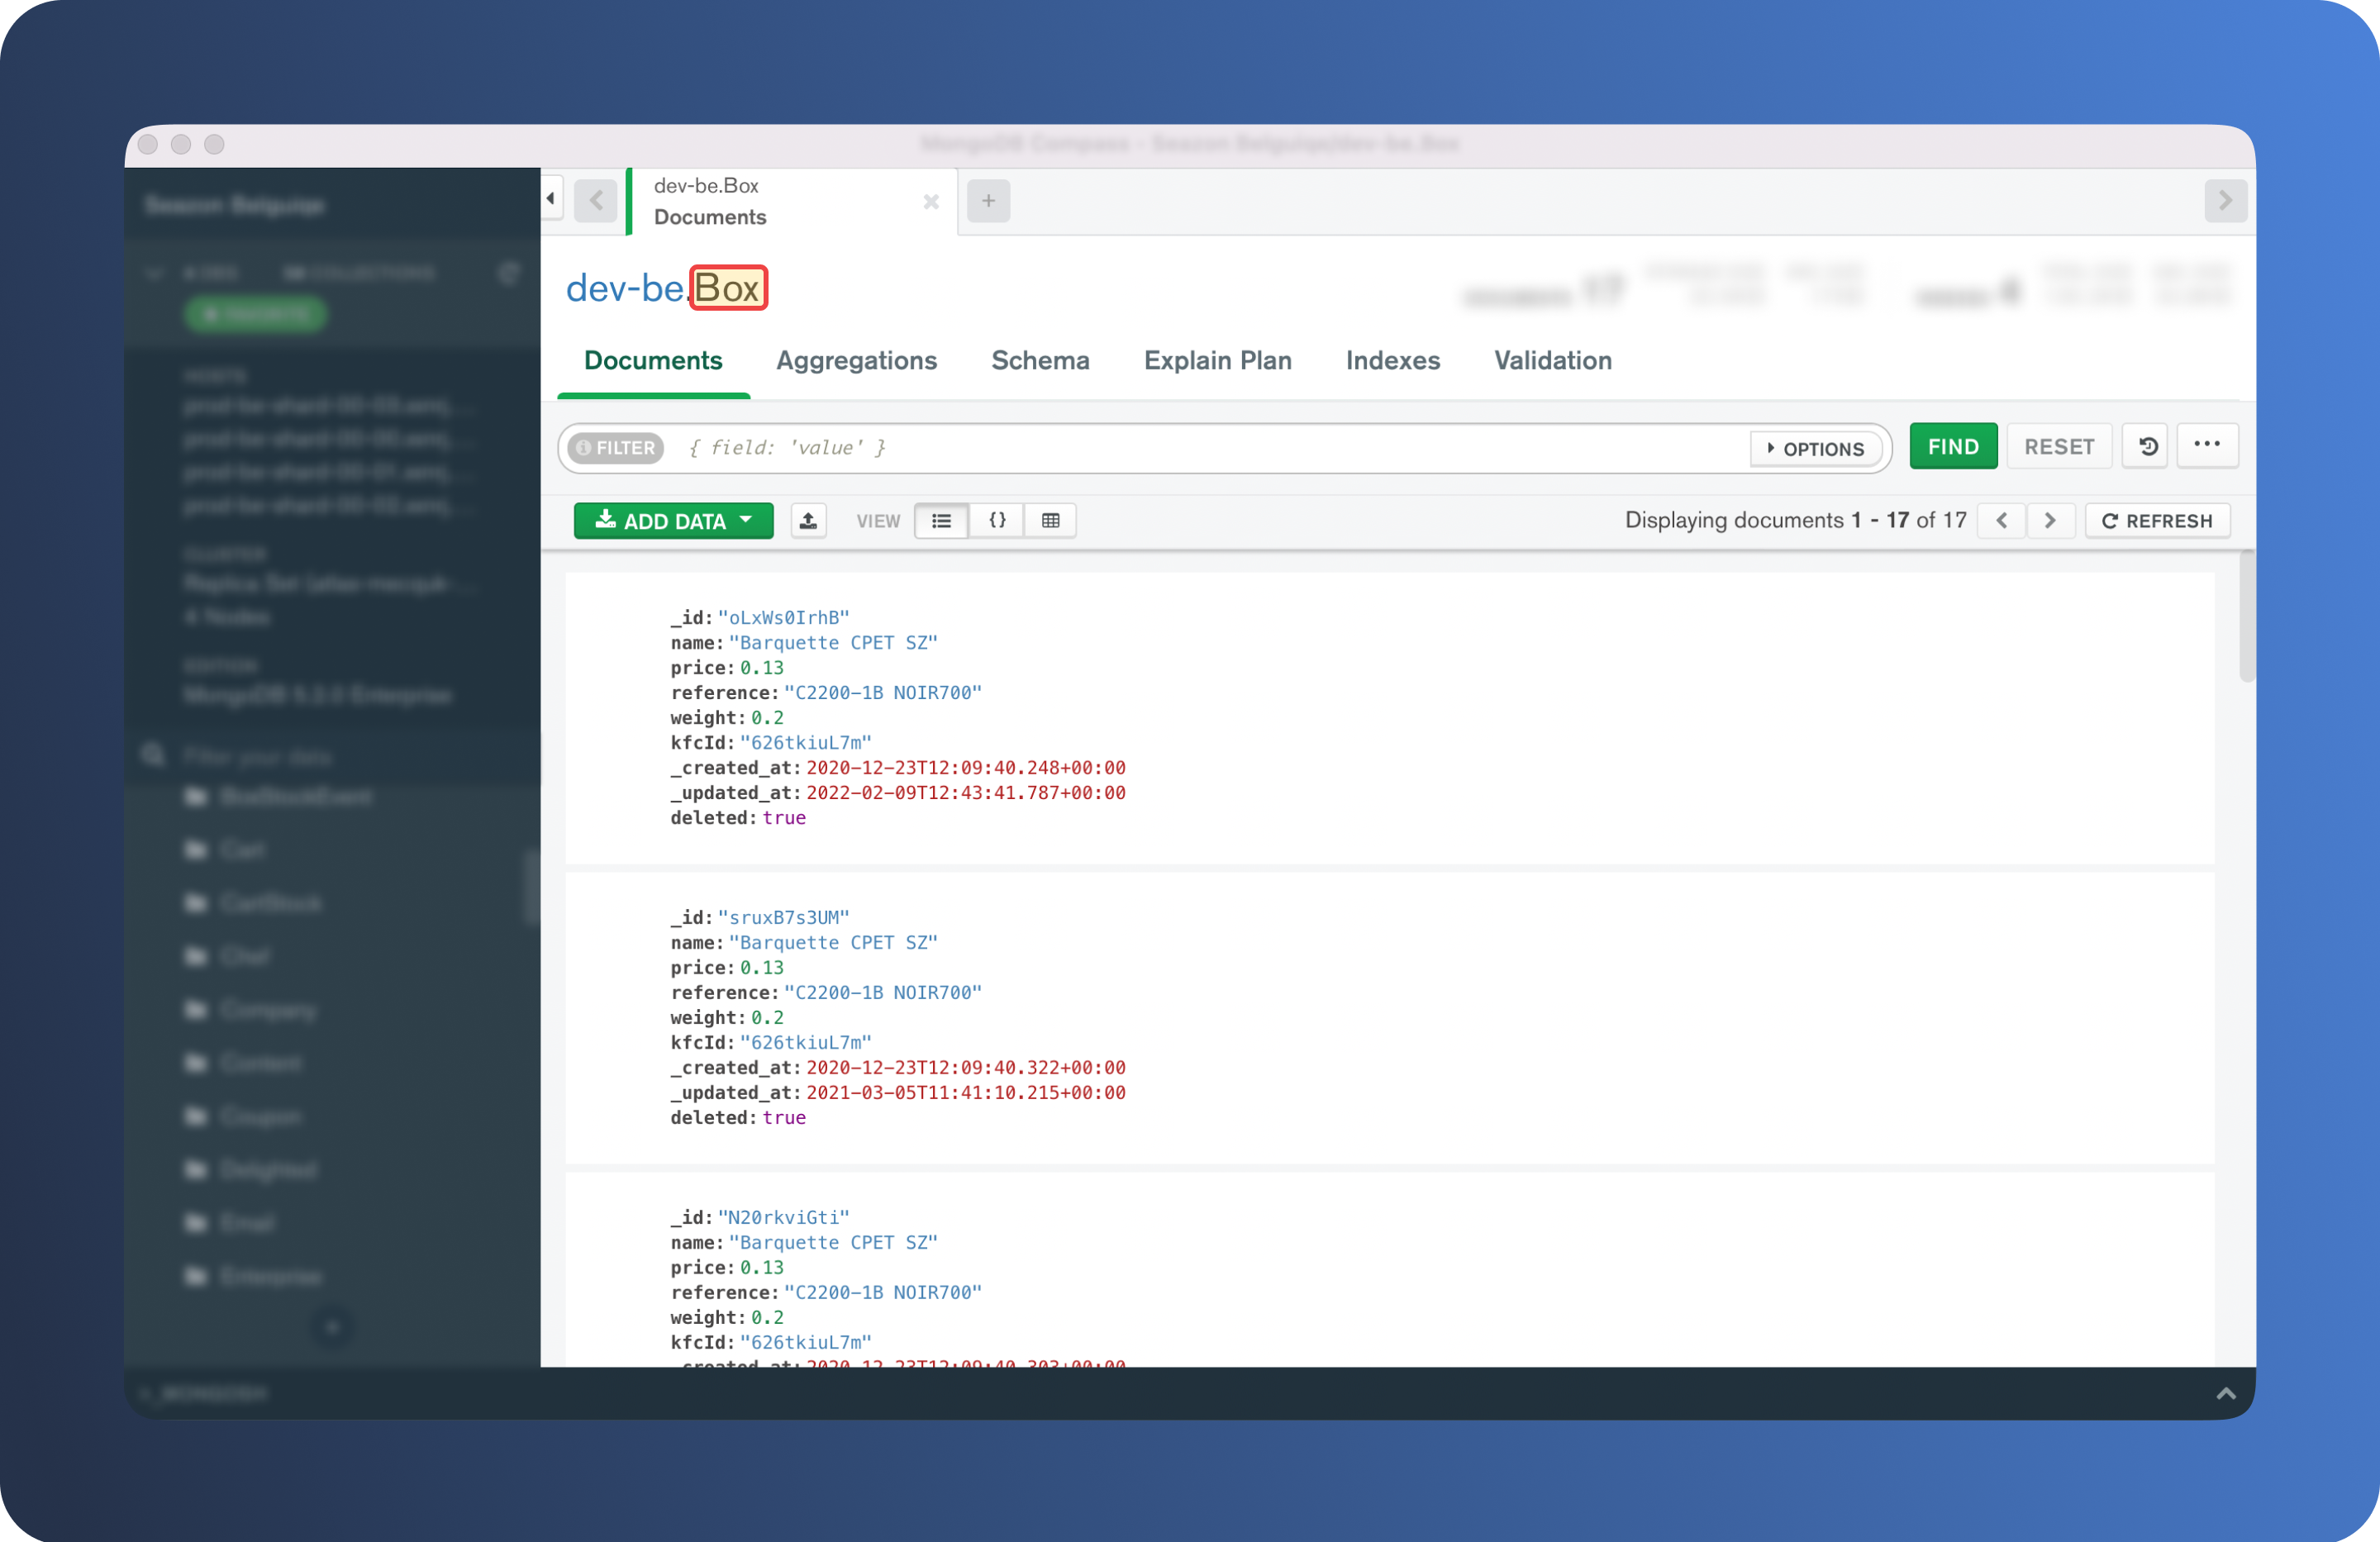
- MongoDB Collection: Name of the collection from your Mongo database, please note that this field is case-sensitive. E.g. Here we want to use a collection named
Box.
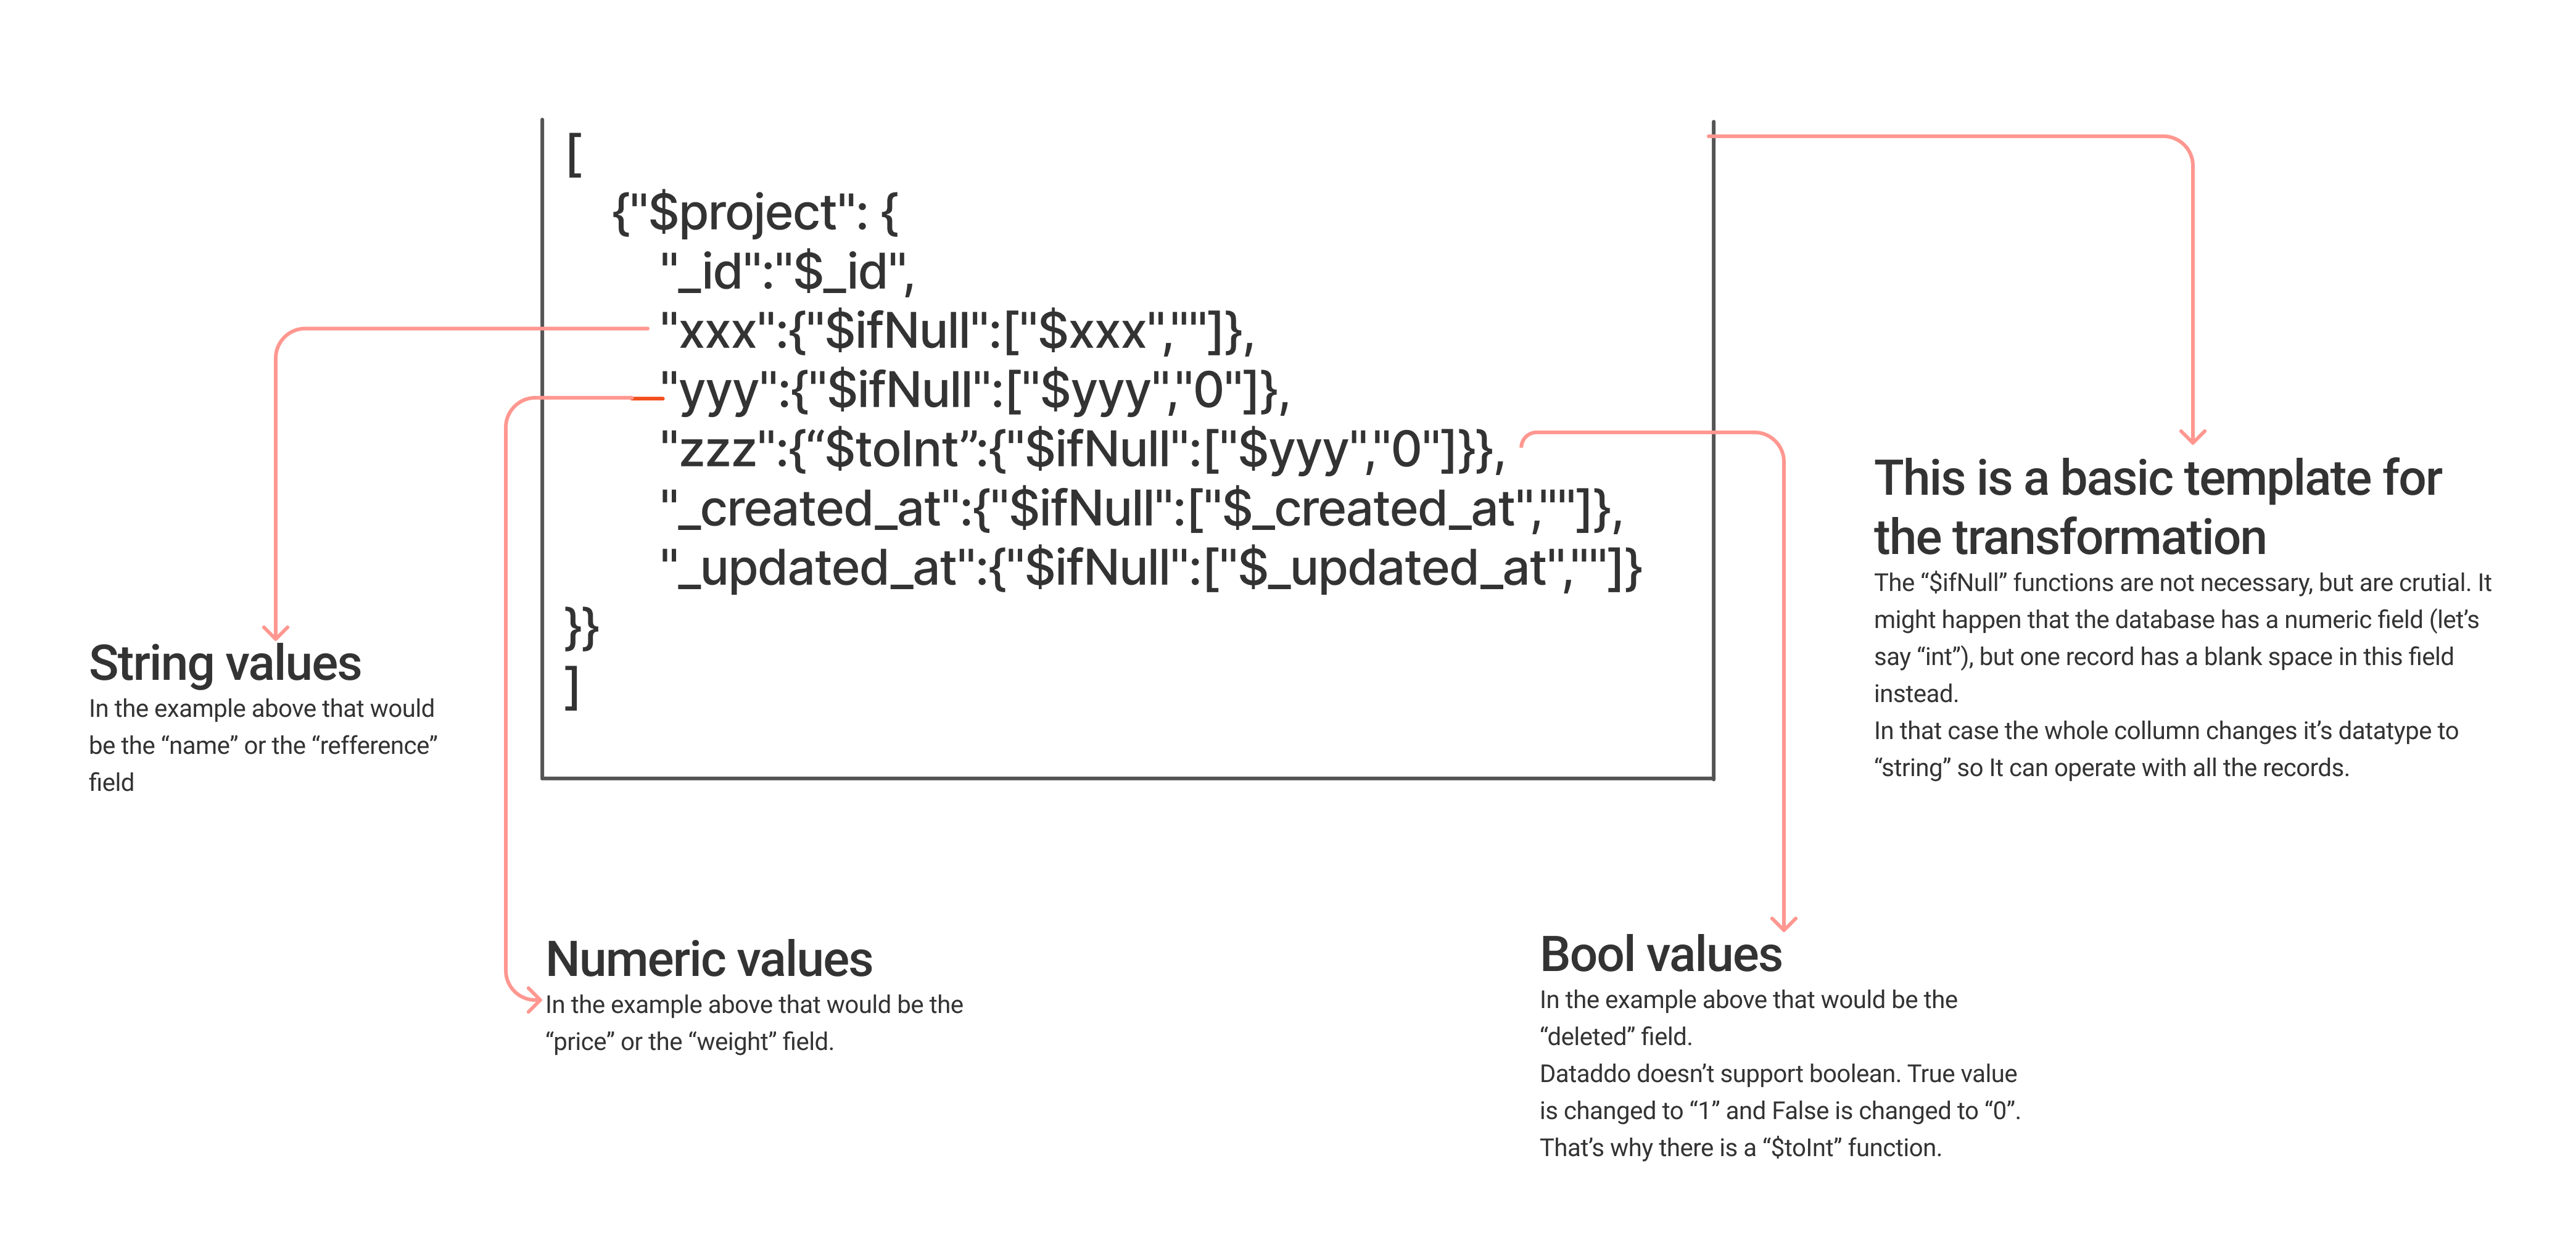
- Aggregation pipeline: Use json format transformation, e.g.
- MongoDB Collection: Name of the collection from your Mongo database, please note that this field is case-sensitive. E.g. Here we want to use a collection named
- Configure your snapshotting preferences. Choose your sync frequency or the exact synchronization time under Show advanced settings.DATADDO TIP
If you need to load historical data, please refer to the Data Backfilling article.
- Preview your data by clicking on the Test Data button in the top right corner. You can adjust the date range for a more specific time frame.
- Click on Save and congratulations, your new data source is ready!
Troubleshooting
Context Deadline Exceeded Error
ERROR CODE
rpc error: code = DeadlineExceeded desc = context deadline exceeded
This issue may be caused by extracting data over an extended timeframe. Use WHERE or LIMIT clauses in your SQL query to manage the size and scope of the data extraction.
- Use
WHEREto specify the date range.SELECT * FROM your_table WHERE date_column BETWEEN '202X-01-01' AND '202X-01-31'; - Use
LIMITto specify the specify the maximum number of records to return.SELECT * FROM your_table LIMIT 1000; - Combine
WHEREandLIMITfor more precise control. The query in this example will return the first 1000 records where the date is after January 1, 202X.SELECT * FROM your_table WHERE date_column > '202X-01-01' LIMIT 1000;
Related Articles
Now that you have successfully created a data source, see how you can connect your data to a dashboarding app or a data storage.
Sending Data to Dashboarding Apps
Sending Data to Data Storages
Other Resources