AFAS is a Dutch software company that provides business software solutions for various aspects of company management, including HR, finance, payroll, and CRM. Their software aims to help organizations streamline their processes, improve efficiency, and manage different aspects of their operations through integrated software tools.
Authorize Connection to AFAS
In AFAS
To authorize your AFAS account, you will need an AFAS token (= API token).
- In your AFAS account, create an App Connector that will allow Dataddo to securely extract your data. To do so, refer to the official AFAS documentation (Dutch only).
- After creating the connection, copy the AFAS token.
In Dataddo
- On the Authorizers page, click on Authorize New Service and select AFAS.
- Select your Environment Type and provide your Environment ID.
- Fill in the generated AFAS token.
- Rename your authorizer for easier identification and click on Save.
How to Create an AFAS Data Source
- On the Sources page, click on the Create Source button and select the connector from the list.
- From the drop-down menu, choose your authorizer.Didn't find your authorizer?
Click on Add new Account at the bottom of the drop-down and follow the on-screen prompts. You can also go to the Authorizers tab and click on Add New Service.
- Name your data source and select your metrics and attributes.

- [Optional] Configure your advanced settings. If you are unsure about how to proceed, we recommend skipping this step.
- Configure your sync frequency or set the exact synchronization time under Show advanced settings.DATADDO TIP
If you need to load historical data, refer to the Data Backfilling article.
- Preview your data by clicking on the Test Data button in the top right corner. You can adjust the date range for a more specific time frame.
- Click on Save and congratulations, your new data source is ready!
In Optional Settings you can choose your Sorting Column to order your data according to one of the attributes.
You can, for example, choose to retrieve only the latest records like last updated date or created date. For example, sorting your data by last updated date will allow for only the most recently modified 10 000 records to be extracted daily.
You can also filter results a field called JSON FILTER. To learn more about this, please consult the official AFAS documentation.
How to Load All Your Records
To load historical data, we recommend first checking if fields such as created on or last modified on can be added to your GetConnector. These fields should be available for nearly all GetConnector definitions.
Once all your historical data is extracted, the "created on" or "last modified on fields will allow you to sort your data according to date. As a result, you can keep extracting only the most recent records.
If these fields are not available, you can sort data only according to e.g. ID. In this case, you won't be able extract the most recent data after you are done with historical data load. Proceed with the alternative approach instead.
Load All Data in Batches
Loading AFAS historial data will be done in batches.
Load your historical data to a data warehouse using the upsert write mode to make sure that Dataddo will take care of any duplicates for you.
1. Increase the limit to 50,000 records
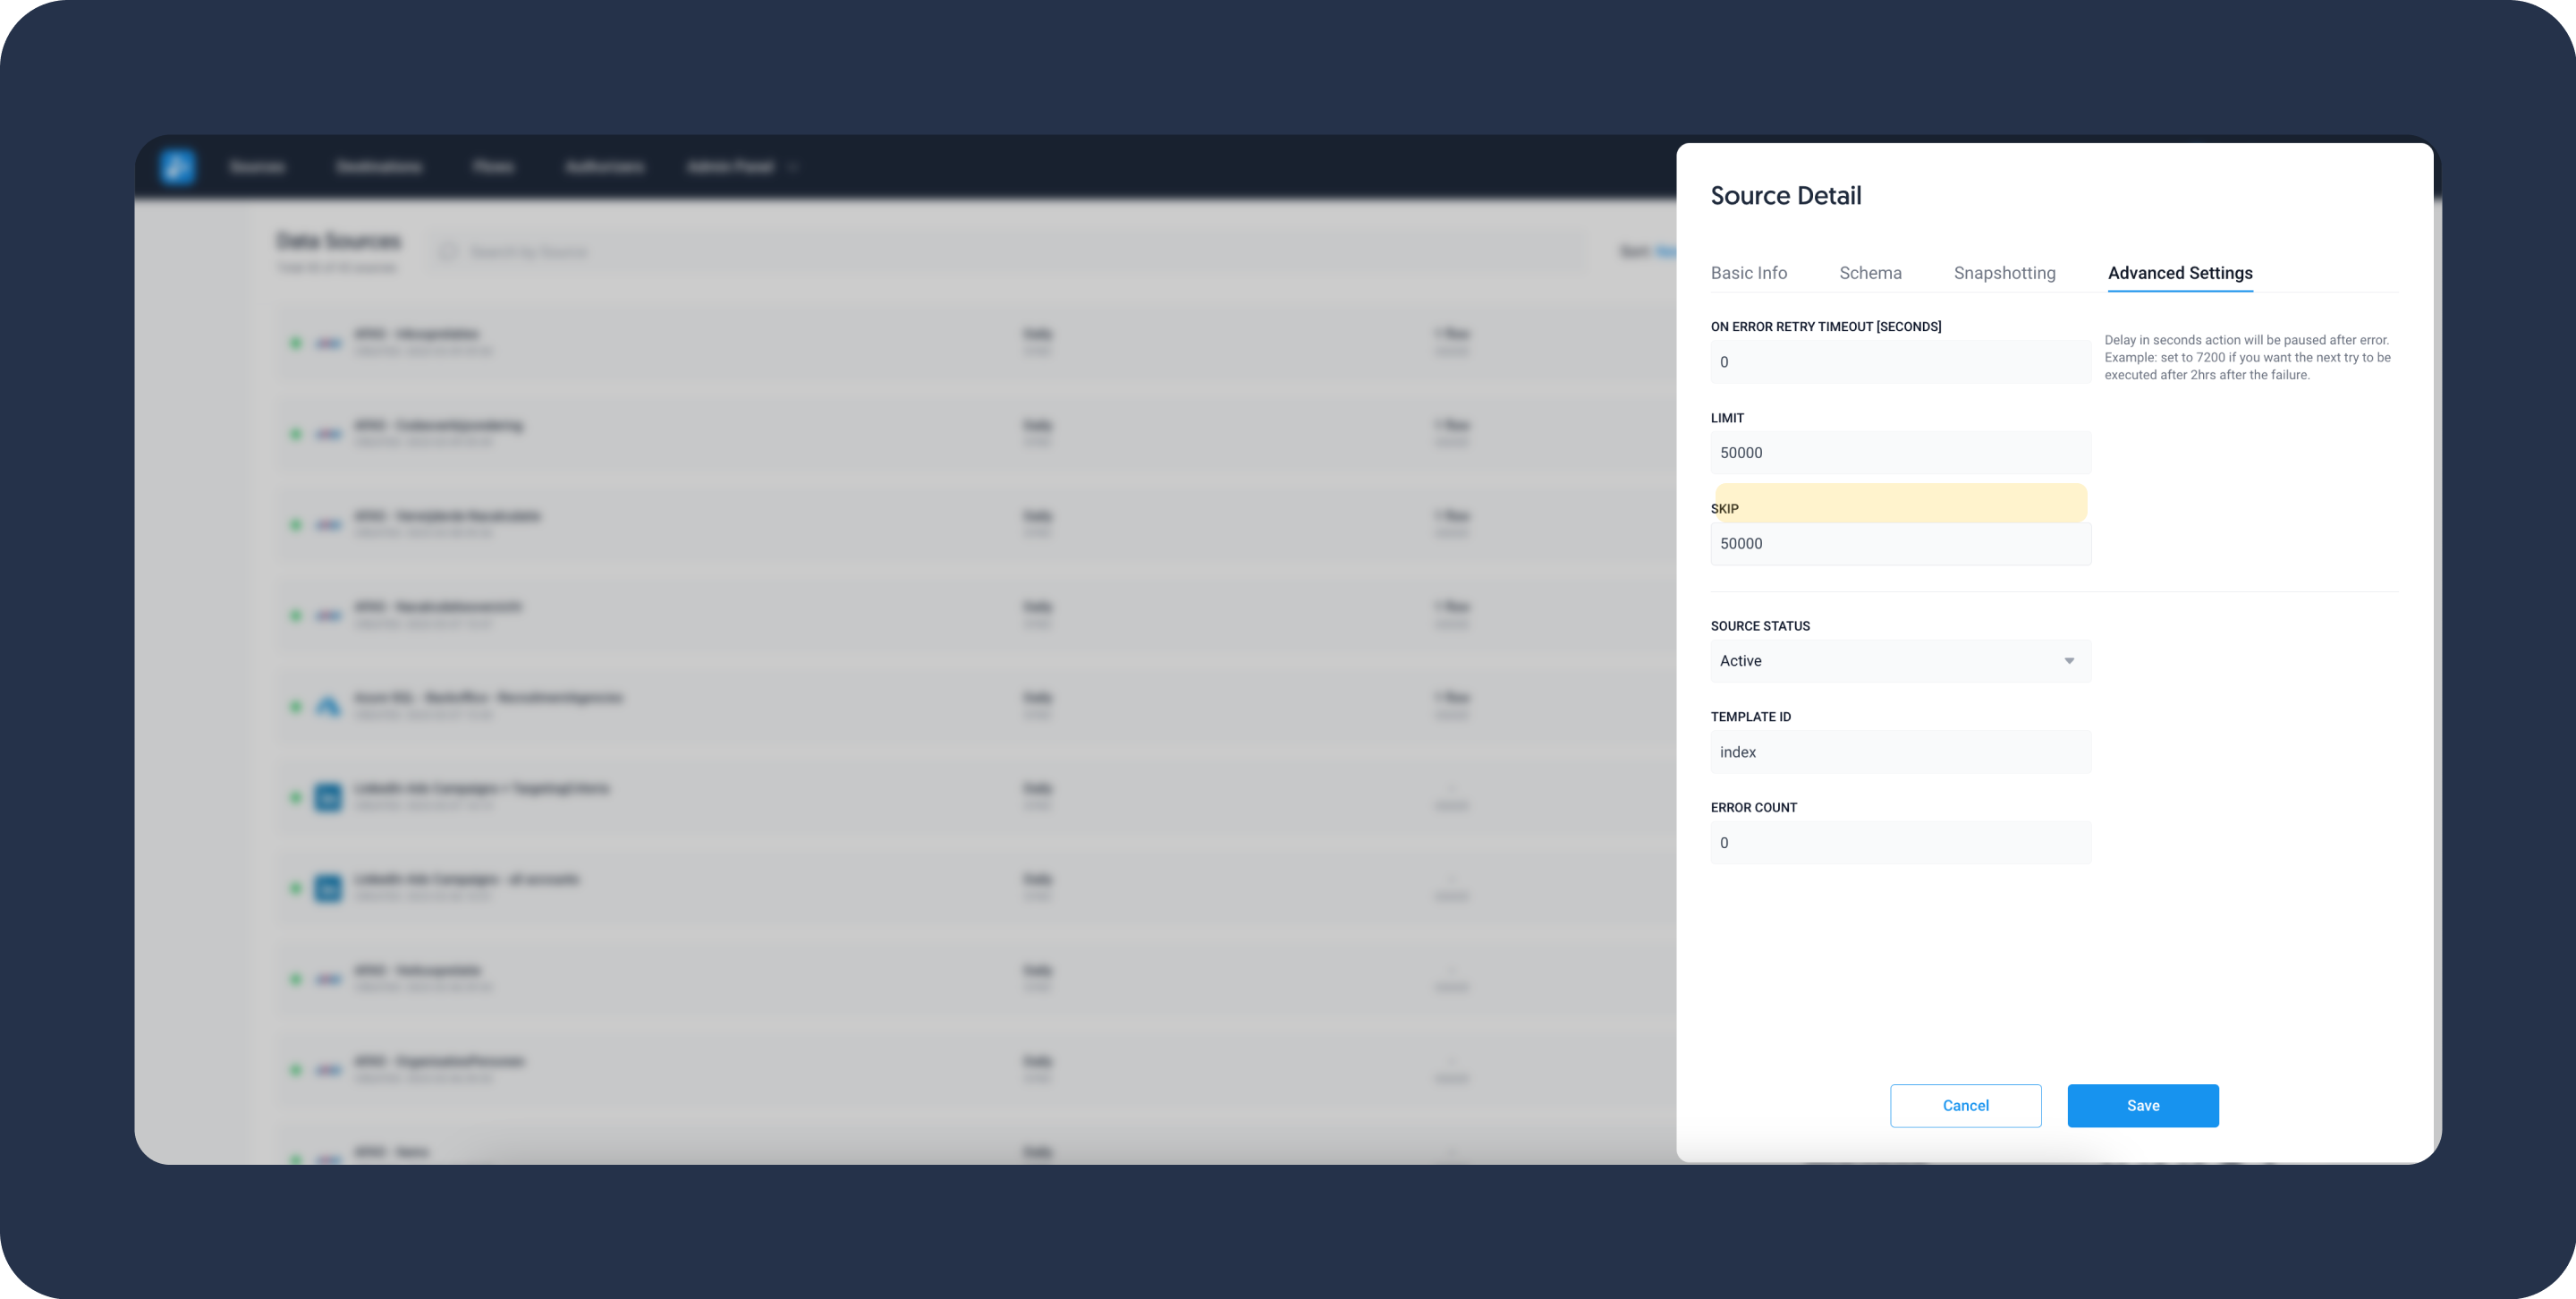
By default, the AFAS connector will extract 10,000 records. Increase the limit to 50,000 (recommended maximum) in your source's advanced settings.
Click on your source and navigate to the Advanced Settings tab and change the limit to 50,000 records.
2. Run manual data extraction
Click on the manual data load button to extract the initial 50,000 record. You can check if your extraction was succesful in the logs.
3. Load historical data to your data warehouse
If you are using a data warehouse, navigate to your flow and click on the manual data insert button.
4. Go back to your source and increase the Skip field by 50,000
Navigate back to the Advanced Settings tab of your source and increase the Skip field by 50,000. Next extraction job will skip the previously extracted data and will extract the next 50,000 records.

5. Perform manual data load for your source and flow again
Repeat steps 2-5 until there is no more data left or until you get a number lower than the limit (50,000). Don't forget to increase the Skip field by 50,000 every time or insert your data using upsert write mode to avoid duplicates.
The total number of records of your specific GetConnector is 323,000, you will need to extract data in 7 batches. As the last batch will only produce 23,000 records, you will need to re-adjust the limit as per step 1.
In some cases, sorting data by ID or a similar field will make more sense for the initial historical data load.
Setting up Daily Increments
Once all historical data has been loaded, return your source's settings to the initial state to extract the latest records.
If you expect a few thousands records a day, we recommend setting your limit to 10,000-20,000. Otherwise, extract full 50,000 records daily, in which case we recommend using the the upsert write mode to insert data into your data warehouse.
If you want to extract only yesterday's data (including data what was modified yesterday), we recommend trying a JSON filter. To set a JSON filter up, refer to the official AFAS documentation .
This filter can be applied only when creating a new source. After loading all your historical data, set up a new source with the JSON filter and connect it to your data warehouse. Don't forget to delete the original source.
Alternative Approach
In case you cannot sort data using the created on or last modified on fields, you will need to create multiple sources for your GetConnector and extract all data every time. The sources should look as the following:
- 1st source - limit: 50,000, skip: 0
- 2nd source - limit: 50,000, skip: 50,000
- 3rd source - limit: 50,000, skip: 100,000
- Etc. (until you extract all records)
Add all of these sources created for a specific GetConnector into a single flow. The data will be unioned into a single table which will then be inserted into your data warehouse.
You will need to repeat this process for all the GetConnectors that require this approach.
Troubleshooting
Data Preview Unavailable
No data preview when you click on Test Data might be caused by an issue with your source configuration. The most common causes are:
- Date range: Try a smaller date range. You can load the rest of your data afterward using manual data load.
- Insufficient permissions: Please make sure your authorized account has at least admin-level permissions.
- Invalid metrics, attributes, or breakdowns: You may not have any data for the selected metrics, attributes, or breakdowns.
- Incompatible combination of metrics, attributes, or breakdowns: Your selected combination cannot be queried together. Please refer to the service's documentation to view a full list of metrics that can be included in the same data source.
Related Articles
Now that you have successfully created a data source, see how you can connect your data to a dashboarding app or a data storage.
Sending Data to Dashboarding Apps
Sending Data to Data Storages
Other Resources