In the first step of our quickstart tutorial, we will guide you through creating a data source, which defines where you extract your data from and what kind of data it is.
Prerequisites
Make sure your account (e.g. Facebook account or GA4 account) has permissions to access and extract your data. Usually, at least admin-level permissions are required.
Configure Your Data Source
1. Start Source Creation
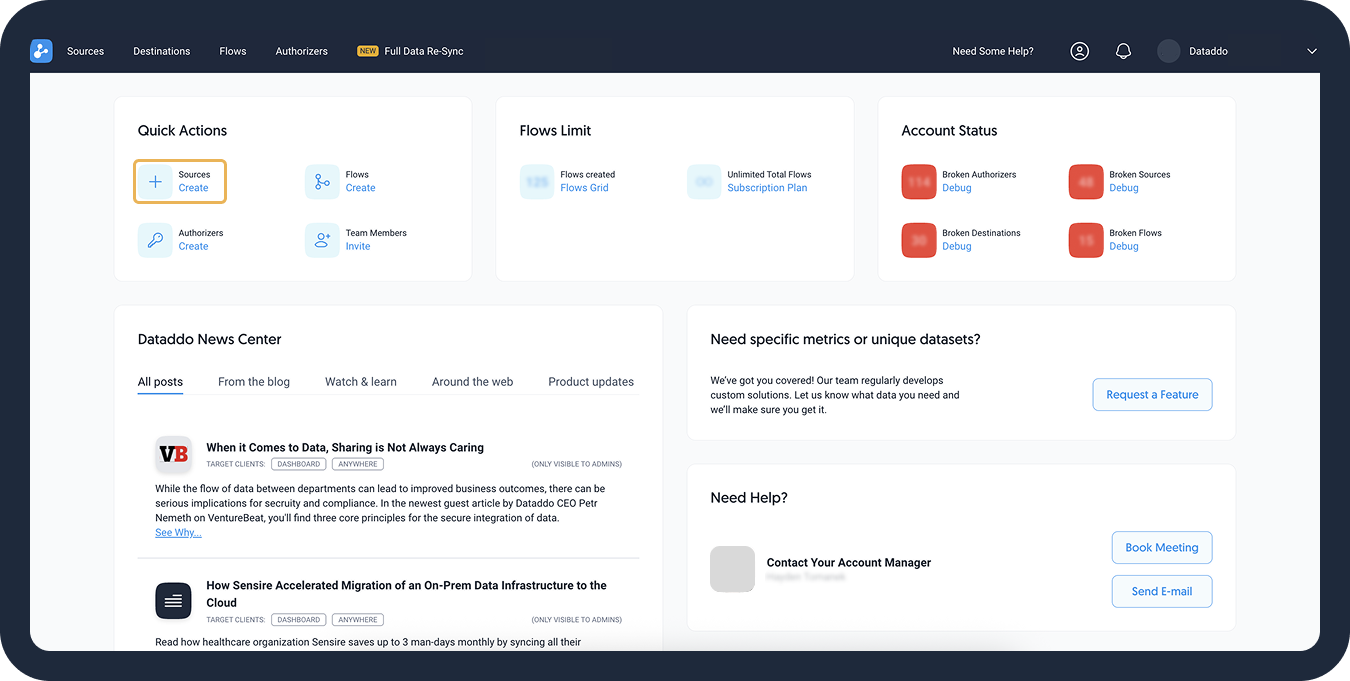
On your Dataddo dashboard, click on the Source Create link under Quick Actions. Select the service from which you want to extract your data.
2. Select Your Account
In this step, select which account (e.g. Facebook Ads account) you want to extract data from. However, this depends on the connector type:
| Custom-Schema Connector | Fixed-Schema Connectors |
|---|---|
| First, click on Add New Account at the bottom of the drop-down and authorize the connection of your service to Dataddo. Custom-schema connectors allow complete freedom when composing your data source metrics and attributes (e.g. Google Ads, Facebook Ads), which we will select in the next step. |
First, select a dataset (e.g. Stripe, Gusto), which is a pre-selected set of attributes. If you are not sure which dataset you need but know the metrics and attributes, use the Search by Name or Attribute function. Then, in the next step, click on Add New Account at the bottom of the drop-down and authorize the connection of your service to Dataddo. |
When you add a new account, you also create a new authorizer. You can always add more authorizers or accounts later.
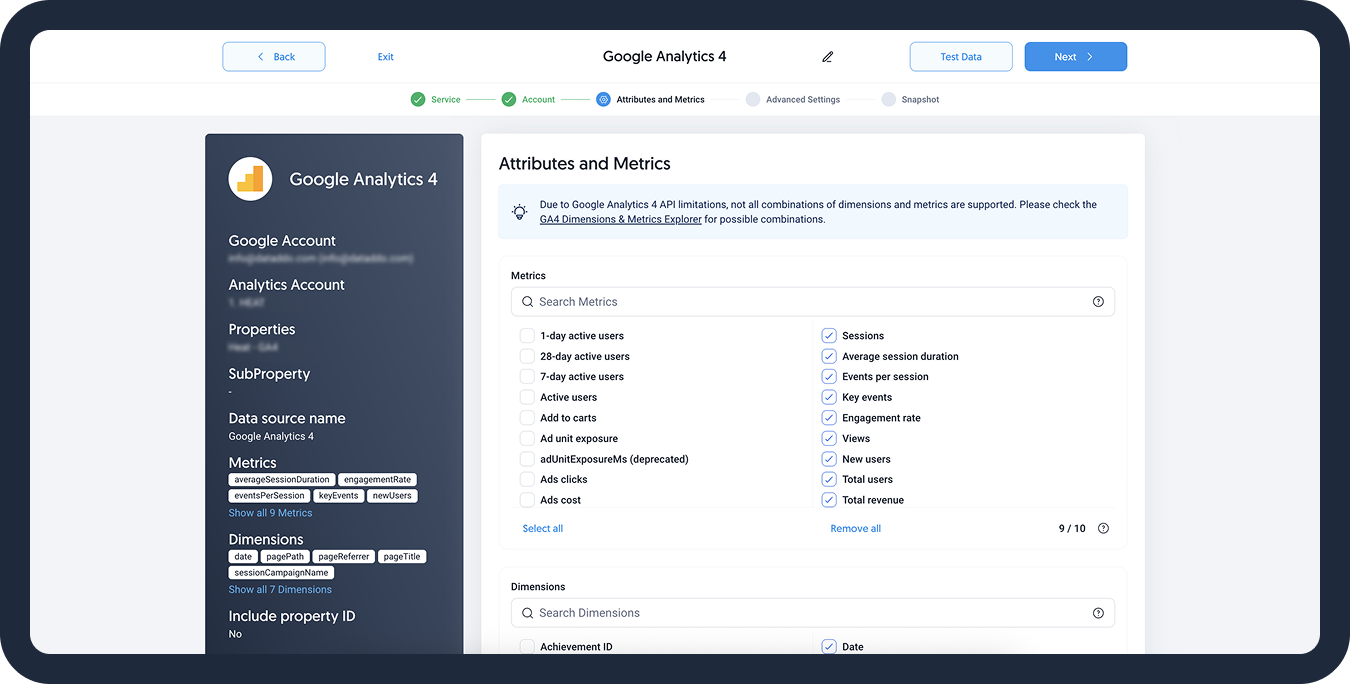
Select Metrics, Dimensions, or Attributes
Next, let's select metrics, dimensions, or attributes to specify what data you want to extract. In short, you are defining the actual data model of the source and choosing what columns will be included in the data source.
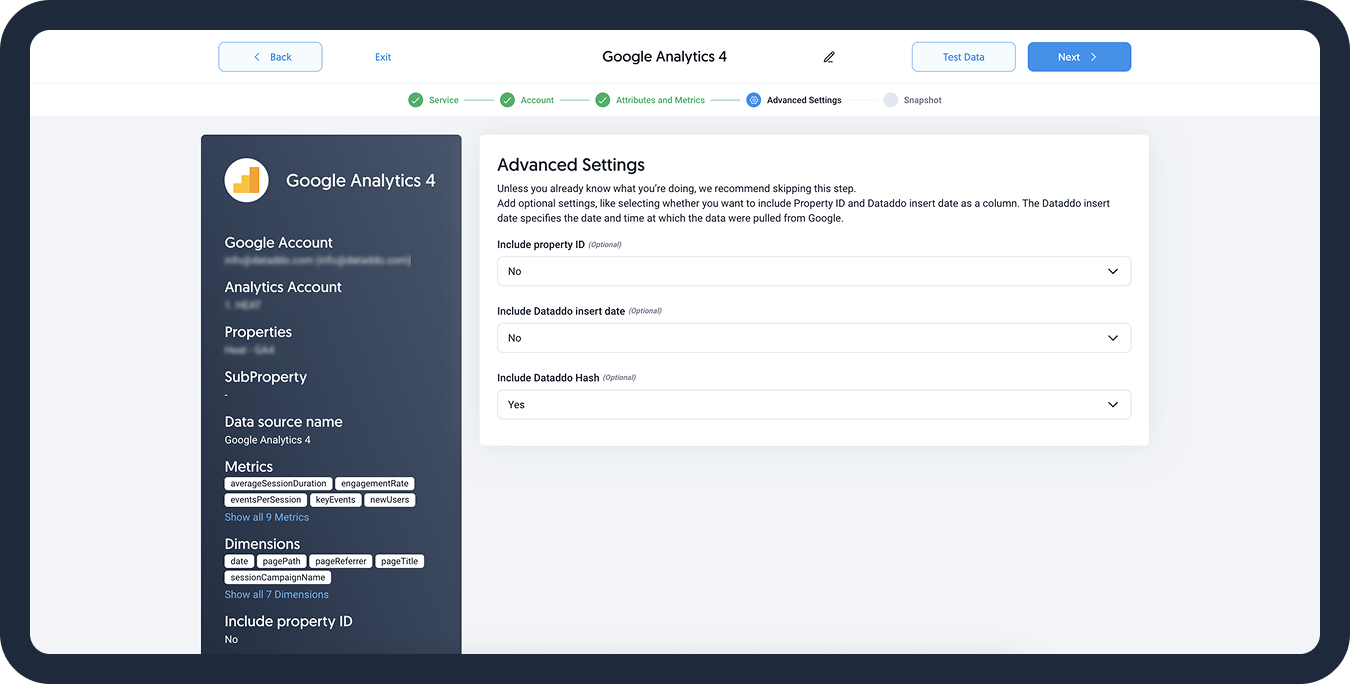
Select Metadata in Advance Settings
In this step, you can select what metadata you want to include. Dataddo allows the addition of the following fields to your data:
| Metadata Field | Description | Use |
|---|---|---|
| Property ID | The unique identifier of the data property (such as an account, property, or data stream) from the original platform, like Google Analytics or Meta Ads. |
|
| Dataddo Insert Date | The timestamp of when a particular record was ingested into the Dataddo system and written to your destination (like a data warehouse or BI tool). |
|
| Dataddo Hash | A unique value (like a fingerprint) generated from the values in each row. It’s typically a hash of key fields (like campaign ID, date, metric values, etc.). |
|
Finish Source Setup
1. Schedule the Snapshotting
Select the frequency of your snapshotting. Snapshots determine how often your data should be extracted. Recommended default is daily snapshotting to make sure you have up-to-date data.
Click on the Show Advanced Settings button to expand additional options. Here, you can:
- Configure a custom date range
- Select the exact time (hour and minute) for the extraction
2. Allow Empty Data Extractions
When your source connector attempts to extract data but finds no available rows (e.g., due to filters, date range, or the source being temporarily empty), Dataddo handles the situation based on the Allow Empty setting:
Allow Emptyis enabled (default behavior): The source will not break. Instead, Dataddo will complete the run and simply extract zero rows. This is useful for workflows where temporary absence of data is expected (e.g., daily reports with no activity).Allow Emptyis disabled: The source will break and return an error. This is useful for alerting you when data is unexpectedly missing.
3. Test Data and Save
Finally, click on the Test Data button to preview and confirm your data and Save your configuration.
Testing your data is a great way to explore your data, especially when you're unsure what certain attributes represent. Since the table is populated with live data, it's easy to see real values and better understand each field before setting up your source.
Well done, your new data source is ready!
Next Steps
To extract and load historical data, see our articles on data backfilling.