CSV, or Comma-Separated Values, is a plain-text file format used to store tabular data, where each line of the file represents a row of data, and the values in each row are separated by commas or other delimiters, like semicolons or tabs. CSV files are commonly used for data import/export, spreadsheet applications, and database management due to their simplicity and compatibility with various software systems.
How to Create a CSV Data Source
A comma-separated values (CSV) file is a delimited text file that uses a comma to separate values and each line of the file is a data record. This guide will be divided into the following steps:
- Fill in Basic File Information
- Optional Steps: Define Your CSV File
- Specify Your HTTP Request
- Preview Data and Save Your Data Source
If you need to authorize your connection, there are several possible ways to do so. Please refer to the section on authorization methods.
Fill in Basic File Information
- On the Sources page, click on the Create Source button and select the connector from the list.
- Select the HTTP method to define a set of request methods.
- Insert the URL of your CSV file. You can embed the service API authorization key or token directly in the call’s URL. For more information, refer to the section on authorization.
- If authorization is needed, select your account.
- Select your snapshot keeping policy.
Optional Steps: Define Your CSV File
- Select your delimiter if it is not the default comma.
- Select how the start of a new line is defined. This can be defined in two ways:
- Windows-based systems use
\r\n - Unix-based systems (including Linux and macOS) use
\n
- Windows-based systems use
- If you need to divide the file into multiple consequent queries or when you need only a part of the file
- Set the file offset.
- Specify the row limit. (For more information, see the section on how to use offset and limit.)
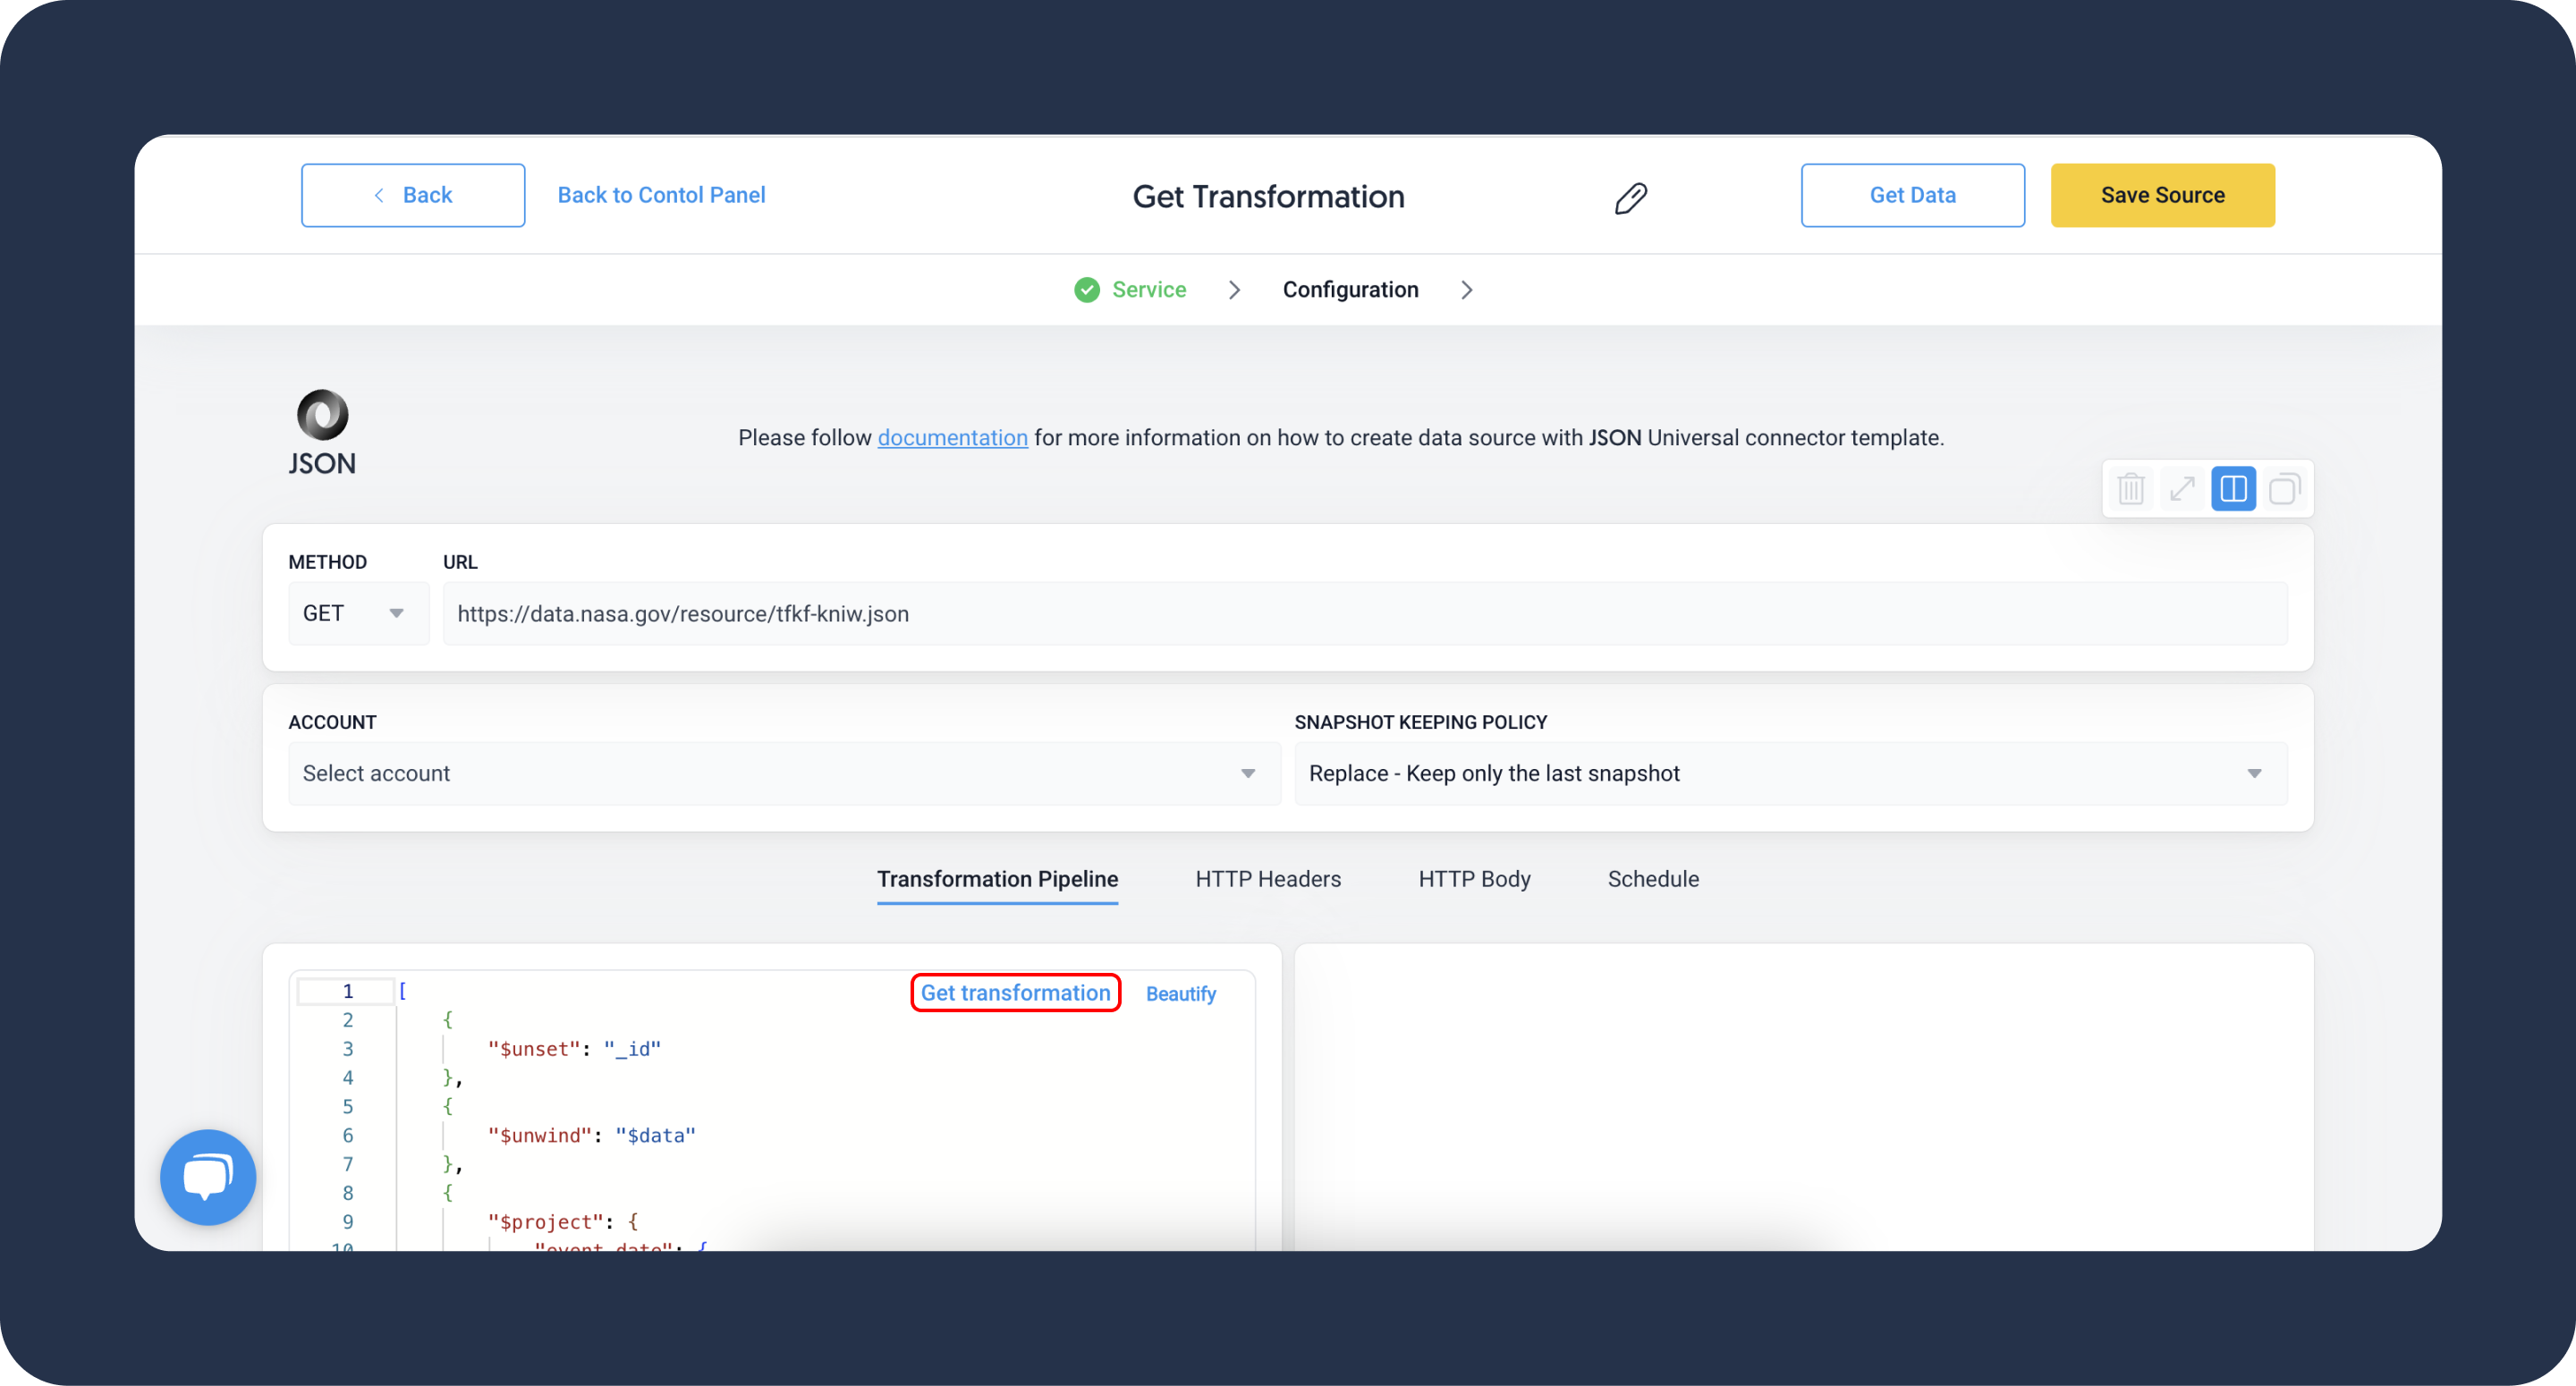
Specify Your HTTP Request
- In the Transformation Pipeline window, define a short script to process the data from these APIs. You can also click on the Get transformation button. In most cases, it will auto-generate a transformation script for you.
- Define your HTTP headers, name-value pairs that will be included in the request and response messages of the HTTP protocol. In most cases, you will need to set this parameter for authorization or setting the content type.DATADDO TIP
For more information, refer to the section on authorization or our article on HTTP headers.
- [Optional] On the HTTP Body tab, you can see the data transmitted in an HTTP transaction message.
- On the Schedule tab, choose your sync frequency or the exact synchronization time.
Preview Data and Save Your Data Source
- Make sure your transformation script has array symbols (square brackets [ ] ).
- Click on the Get Data button to test your transformation and see a preview table.
- Click on Save Source and congratulations, your new data source is ready!
Authorization Methods
Embedding API Key in URL (Query String)
Some services authorize API access via a key embedded directly in the call’s URL. Here's how you integrate the token into the API endpoint:
https://api.service.com?token=YOUR_TOKEN
Utilizing HTTP Headers for Static Tokens
HTTP headers consist of name-value pairs positioned in the request and response messages of the HTTP protocol. They serve various functions, mainly authorization and defining the content type.
For more information, refer to the article on HTTP headers.
Basic Authorization
HTTP's built-in basic authentication requires sending an Authorization header with each request. This header includes the keyword Basic, followed by a base64-encoded string formatted as username:password. For example:
Authorization: Basic base64EncodedUsernameAndPassword
Example
To authorize as user123 / p@ss123 the client would send the following.
Authorization: Basic dXNlcjEyMzpwQHNzMTIzLg==
When using universal connectors, input the appropriate credentials into your HTTP Header parameters to establish this authorization type.
Bearer Authorization
The bearer token system grants "bearer" access rights via security tokens. Requests must include an Authorization header, prefixed with Bearer and followed by the actual security token. For example:
Authorization: Bearer YOUR_TOKEN
Ensure you input the accurate token into your HTTP Header parameters when setting up Bearer authorization with universal connectors.
Troubleshooting
How to Use Offset and Limit
Offset and limit parameters are useful when you need to divide the file into multiple queries or when you need only a part of the file.
For example, due to a big data volume, you want to divide the data extraction into four batches. To do so, you will need to create four data sources.
- Data source 1: Offset = 0, Limit = 10 000
- Data source 2: Offset = 10 000, Limit = 10 000
- Data source 3: Offset = 20 000, Limit = 10 000
- Data source 4: Offset = 30 000, Limit = 10 000
Related Articles
Now that you have successfully created a data source, see how you can connect your data to a dashboarding app or a data storage.
Sending Data to Dashboarding Apps
Sending Data to Data Storages
Other Resources