Dataddo is a fully managed data integration platform, which monitors all your data sources, data destinations, and data flows 24/7.
In this article, you will find a guide to customizing your personal notifications. By default, the notifications are set up to notify you in-app and by email whenever an issue occurs, however, there are multiple notifications types available.
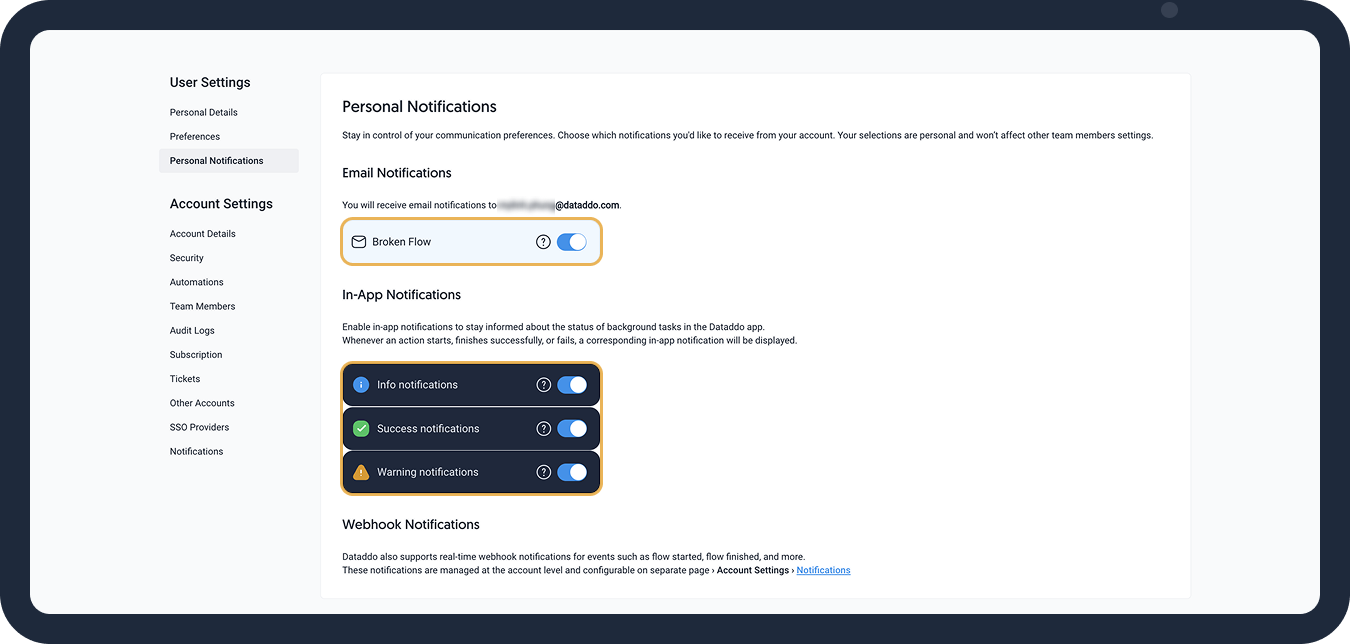
Email Notifications
- Click your profile in the top-right corner and select Settings.
- Navigate to the Personal Notifications page.
- Enable notifications for broken flows.
To ensure you don't miss notifications for important flows, create an email filter or rule. Use the flow names as keywords and direct these emails to a specific folder that you can easily monitor.
To set up filter rules in your email, refer to your email provider's instructions.
In-App Notifications
- Click your profile in the top-right corner and select Settings.
- Navigate to the Personal Notifications page.
- Select which in-app notifications can be displayed in your control panel:
- Info notifications: General information from Dataddo.
- Success notifications: Successful operations such as finished data extraction.
- Warning notifications: Possibly unexpected behaviour such as 0 rows loaded.
Webhook Notifications
Dataddo also allows you to set up custom notifications on Dataddo actions using webhooks. This is useful for setting up a notifications system in e.g. Slack.
Outgoing webhooks notify your systems when specific events occur in your Dataddo account. They are configured at the account level, while email notifications (if enabled) are managed per user/member.
You can use outgoing webhooks to trigger automated actions in your environment, such as:
- Sending a Slack notification
- Starting a data pipeline
- Logging information to your server
- Calling another API
Whenever an event occurs (e.g., an action completes), Dataddo sends an HTTP POST request to your specified target URL.
Webhook customization will be gradually expanded.
Create a Webhook Authorizer
To start using outgoing webhooks, create a new authorizer.

- In the Outgoing Webhook section in the Dataddo portal.
- Select the authorizer type, e.g. Universal HTTP Header.
- Enter your credentials and provide a test URL.
The test URL is used only to verify your credentials. It does not set the webhook's target server.
This allows you to use different endpoints for authorization and actual webhook delivery.
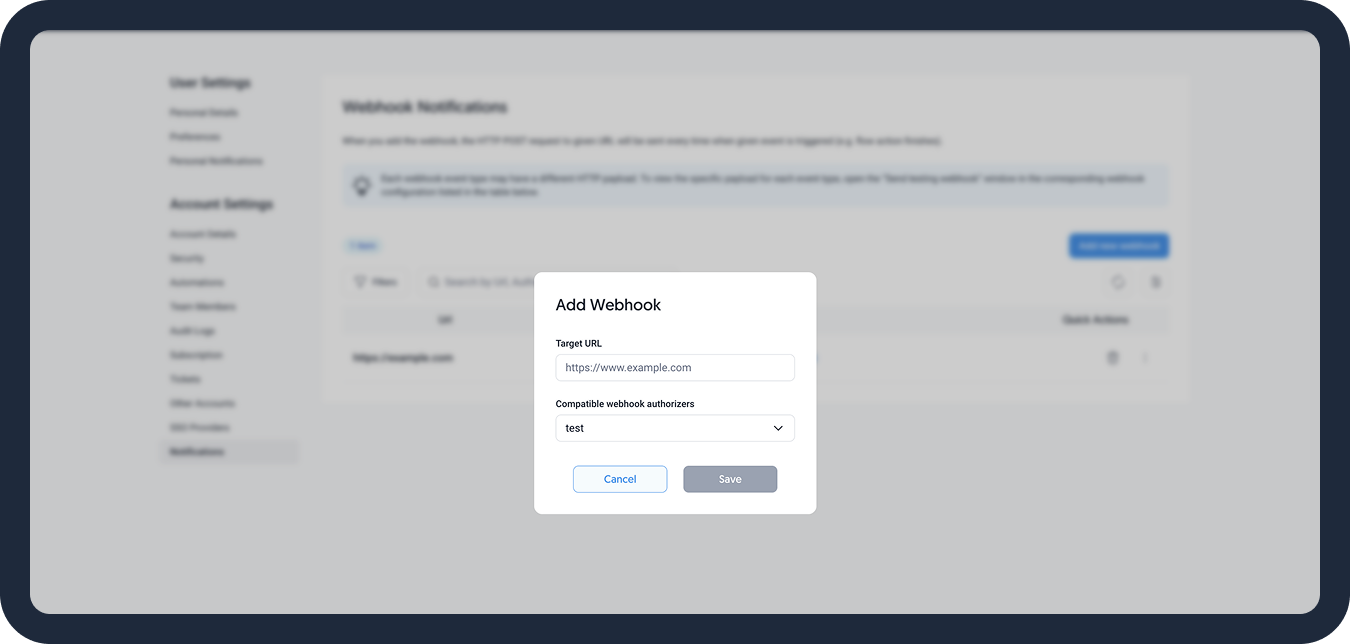
Add a New Webhook
- Click your profile in the top-right corner and select Settings.
- Navigate to the Notifications page.
- Click on Add new webhook.
- Input the target URL and select a compatible webhook authorizer.
- Save the webhook.
- To check if the set up was successful, click the three dots next to the newly created webhook and select Send Testing Webhook.
Edit Webhook Notification
- Click your profile in the top-right corner and select Settings.
- Navigate to the Notifications page.
- Click the three dots next to your webhook and select Edit. Here, you can make changes to the URL or select another webhook authorizer.
Payload & Execution Details
Dataddo webhooks currently send a minimal payload for the following events:
extraction.startedextraction.finishedflow.startedflow.finished
Deprecated Events (to be removed soon):
action.startedaction.finished
Example: Extraction Started Event
{
  "event": "extraction.started",
  "data": {
    "action_type": "extraction",
    "source_id": "423f1fb170bf339eb4050a82",
    "source_label": "data_news.article_has_entity",
    "execution_id": "bzTeWmmnxz9q6rJDEwTXdCfPQX",
    "execution_status": "live"
  }
}
Example: Extraction Finished Event
{
  "event": "extraction.finished",
  "data": {
    "action_type": "extraction",
    "source_id": "233f1fb170bf439eb4050f87",
    "source_label": "data_news.article_has_entity",
    "execution_id": "ccKeXkklyo0p8iWBEuKKbDeODU",
    "execution_status": "live",
    "execution_started": 2351441456,
    "execution_finished": 4251441682,
    "execution_affected_rows": "42021757,
    "following_flows": {
      "673f203425457d4b2e0b9bf4": "data_news.article_has_entity"
    }
  }
}
Example: Flow Started Event
{
  "event": "flow.started",
  "data": {
    "action_type": "write",
    "flow_id": "78cf3ab381df55bec6072b31",
    "flow_label": "user.registration.send_welcome_email",
    "execution_id": "nzYvRqqpLt8s9vANEpHJcKtUWX",
    "execution_status": "live"
  }
}
Example: Flow Finished Event
{
  "event": "flow.finished",
  "data": {
    "action_type": "write",
    "flow_id": "683f203425477d4b2e0b9bf9",
    "flow_label": "data_news.article_has_entity",
    "execution_id": "cCnBeYYM37Q8FcoaCxz3D0NEB6",
    "execution_status": "live",
    "execution_started": 3251441643,
    "execution_finished": "4751441882,
    "execution_affected_rows": 22021755,
  }
}
For more information:
- Call our Headless API.
- Use the
execution_idto retrieve the full execution details.
Current Limitations
- Webhooks can't be configured with filters or custom payloads.
- You must filter events on your side until more options are released.