JSON, or JavaScript Object Notation, is a lightweight data interchange format that is easy for humans to read and write and easy for machines to parse and generate. It is often used to transmit data between a server and a web application, as well as to store configuration information and structured data.
How to Create a JSON Data Source
Fill in Basic File Information
- On the Sources page, click on the Create Source button and select the connector from the list.
- Select the HTTP method to define a set of request methods.
- Insert the URL of your JSON file. You can specify the date range in the URL. For more information, refer to the section on setting a date range.
- If authorization is needed, select your account.
- Select your snapshot keeping policy.
Specify Your HTTP Request
- In the Transformation Pipeline window, define a short script to process the data from these APIs. You can also click on the Get transformation button. In most cases, it will auto-generate a transformation script for you.
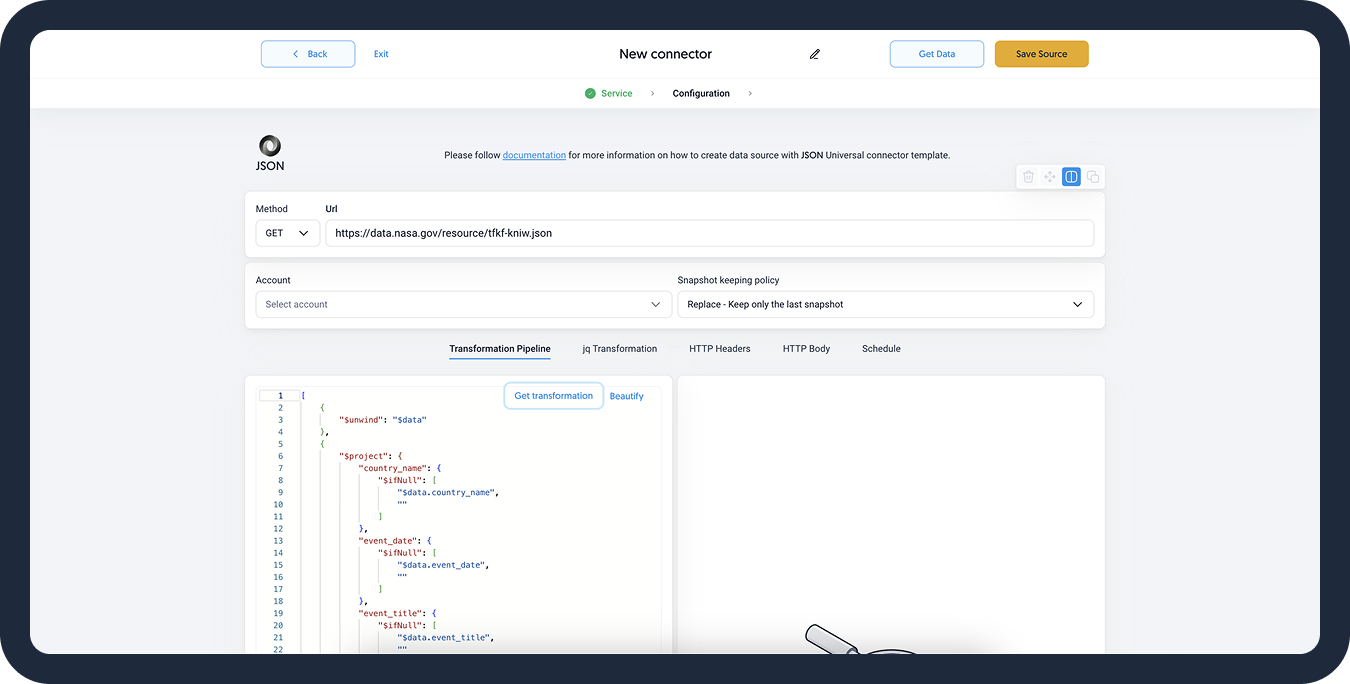
- Define your HTTP headers, name-value pairs that will be included in the request and response messages of the HTTP protocol. In most cases, you will need to set this parameter for authorization or setting the content type.
-
- [Optional] On the HTTP Body tab, you can see the data transmitted in an HTTP transaction message.
In the HTTP Body tab, you can see the data transmitted in an HTTP transaction message. Here, you can specify the date range. For more information, refer to the section on specifying a date range.
- [Optional] On the HTTP Body tab, you can see the data transmitted in an HTTP transaction message.
- On the Schedule tab, choose your sync frequency or the exact synchronization time.
Preview Data and Save Your Data Source
- Make sure your transformation script has array symbols (square brackets [ ] ).
- Click on the Get Data button to test your transformation and see a preview table.
- Click on Save Source and congratulations, your new data source is ready!
Troubleshooting
Specific Date Range
If you want to extract data from a specific time period, you can do so in the URL or HTTP body section.
Use static or dynamic date range to specify your date range. For more information, see our article on types of date ranges.
Related Articles
Now that you have successfully created a data source, see how you can connect your data to a dashboarding app or a data storage.
Sending Data to Dashboarding Apps
Sending Data to Data Storages
Other Resources