Keycloak is an open-source identity and access management (IAM) solution. It provides a robust set of features for user authentication, authorization, and single sign-on (SSO) capabilities, allowing organizations to secure their applications and services by managing user identities, roles, and permissions in a centralized and scalable manner.
Refer to our website for the list of metrics and attributes available in Dataddo.
Authorization
In Keycloak
To authorize your Keycloak account, you will need your server name, realm name, client ID, and a client secret.
Obtaining your client secret differs depends on the Keycloak version that you're using. Follow these steps for
Keycloak Version before 20
To get your client secret, you need to make sure your client's access type is confidential and not public.
- Go to the Clients section of your realm admin panel.
(<protocol>://<host>:<port>/auth/admin/master/console/#/realms/<your realm>/clients/<your client code>) - On the Settings tab, change the Access Type to confidential and save.
- A new tab called Credentials will show up, click on it.
- Make sure the Client Authenticator field is set to Client ID and Secret.
- Copy your client secret.
Refer to Keycloak's official documentation for more information on authorization.
Keycloak Version 20 and Later
- Go to the Clients section of your realm admin panel.
(<protocol>://<host>:<port>/auth/admin/master/console/#/realms/<your realm>/clients/<your client code>) - Click on Create client.
- Enter the client ID (a unique identifier for your client).
- On the next page, set the Client authentication option to On and save.
- Back on the Clients page, navigate to the Credentials tab.
- Make sure the Client Authenticator field is set to Client ID and Secret.
- Copy your client secret.
Refer to Keycloak's official documentation for more information on authorization.
Client vs Realm
Realms manage a set of users, credentials, roles, and groups. A user belongs to and logs into a realm. Realms are isolated from one another and can only manage and authenticate the users that they control.
Clients are entities that can request Keycloak to authenticate a user. Most often, clients are applications and services that want to use Keycloak to secure themselves and provide a single sign-on solution. Clients can also be entities that only want to request identity information or an access token so that they can securely invoke other services on the network that are secured by Keycloak.
In Dataddo
- On the Authorizers page, click on Authorize New Service and select Keycloak.
- Fill in the following fields:
- Server: Keycloak server name.
- Realm Name: Keycloak realm name.
- Client ID: Client ID you set in earlier step.
- Client Secret: Client secret generated for your client.
- Rename your authorizer for easier identification and click on Save.
How to Create a Keycloak Data Source
- On the Sources page, click on the Create Source button.
- Select the connector from the list and name your data source.
- On the Dataset step, select your dataset.DATADDO TIP
If you're unsure which dataset to select, use the search bar to look for datasets with the desired attributes or metrics.
- On the Account step select your authorizer from the drop-down menu.Didn't find your authorizer?
Click on Add new Account at the bottom of the drop-down and follow the on-screen prompts. You can also go to the Authorizers tab and click on Add New Service.
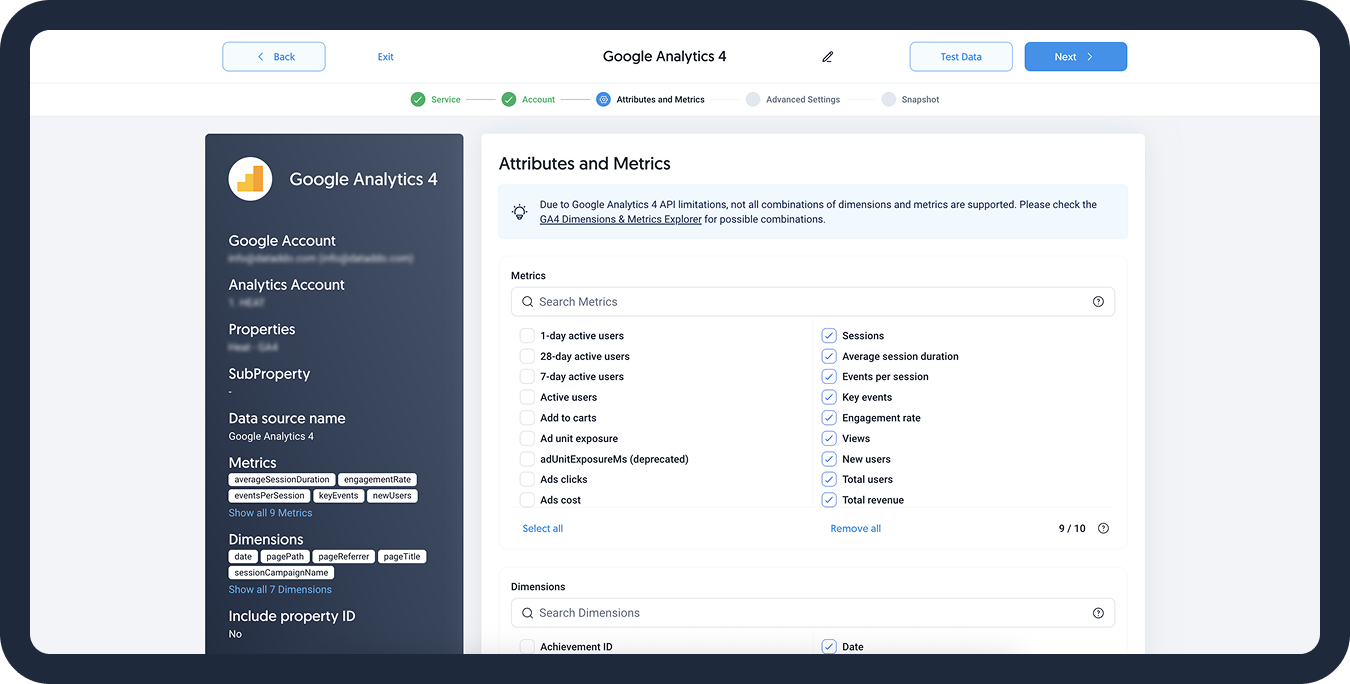
- On the Attributes and Metrics step, select the metrics and attributes you want to extract.
- On the Metadata step, select which metadata fields such as extraction time to add to your data.
- On the Snapshot step:
- Configure your sync frequency or click Show advanced settings to set the exact synchronization time.DATADDO TIP
To load historical data, refer to the Data Backfilling article.
- [Optional] Enable the Allow Empty Data Extractions toggle to allow the extraction when no data is available.
- Configure your sync frequency or click Show advanced settings to set the exact synchronization time.
- In the top-right corner, click Test Data button to preview extracted data. Adjust the date range for specific time frame.
- Click on Save and congratulations, your new data source is ready!
Troubleshooting
Data Preview Unavailable
No data preview when you click on Test Data might be caused by an issue with your source configuration. The most common causes are:
- Date range: Try a smaller date range. You can load the rest of your data afterward via manual data load.
- Insufficient permissions: Please make sure your authorized account has at least admin-level permissions.
Related Articles
Now that you have successfully created a data source, see how you can connect your data to a dashboarding app or a data storage.
Sending Data to Dashboarding Apps
Sending Data to Data Storages
Other Resources