Panoply is a cloud data platform that provides an integrated solution for data warehousing, data management, and analytics. It allows businesses to centralize their data from various sources, automate data processing, and analyze insights using popular analytics and BI tools.
Prerequisites
- You have created a Panoply project and a database.
Authorize Connection to Panoply
In Panoply
Get a JSON File from your Panoply account:
- In your Panoply account, go to the BI Connection section.
- Click on Send your service account JSON file to your email.
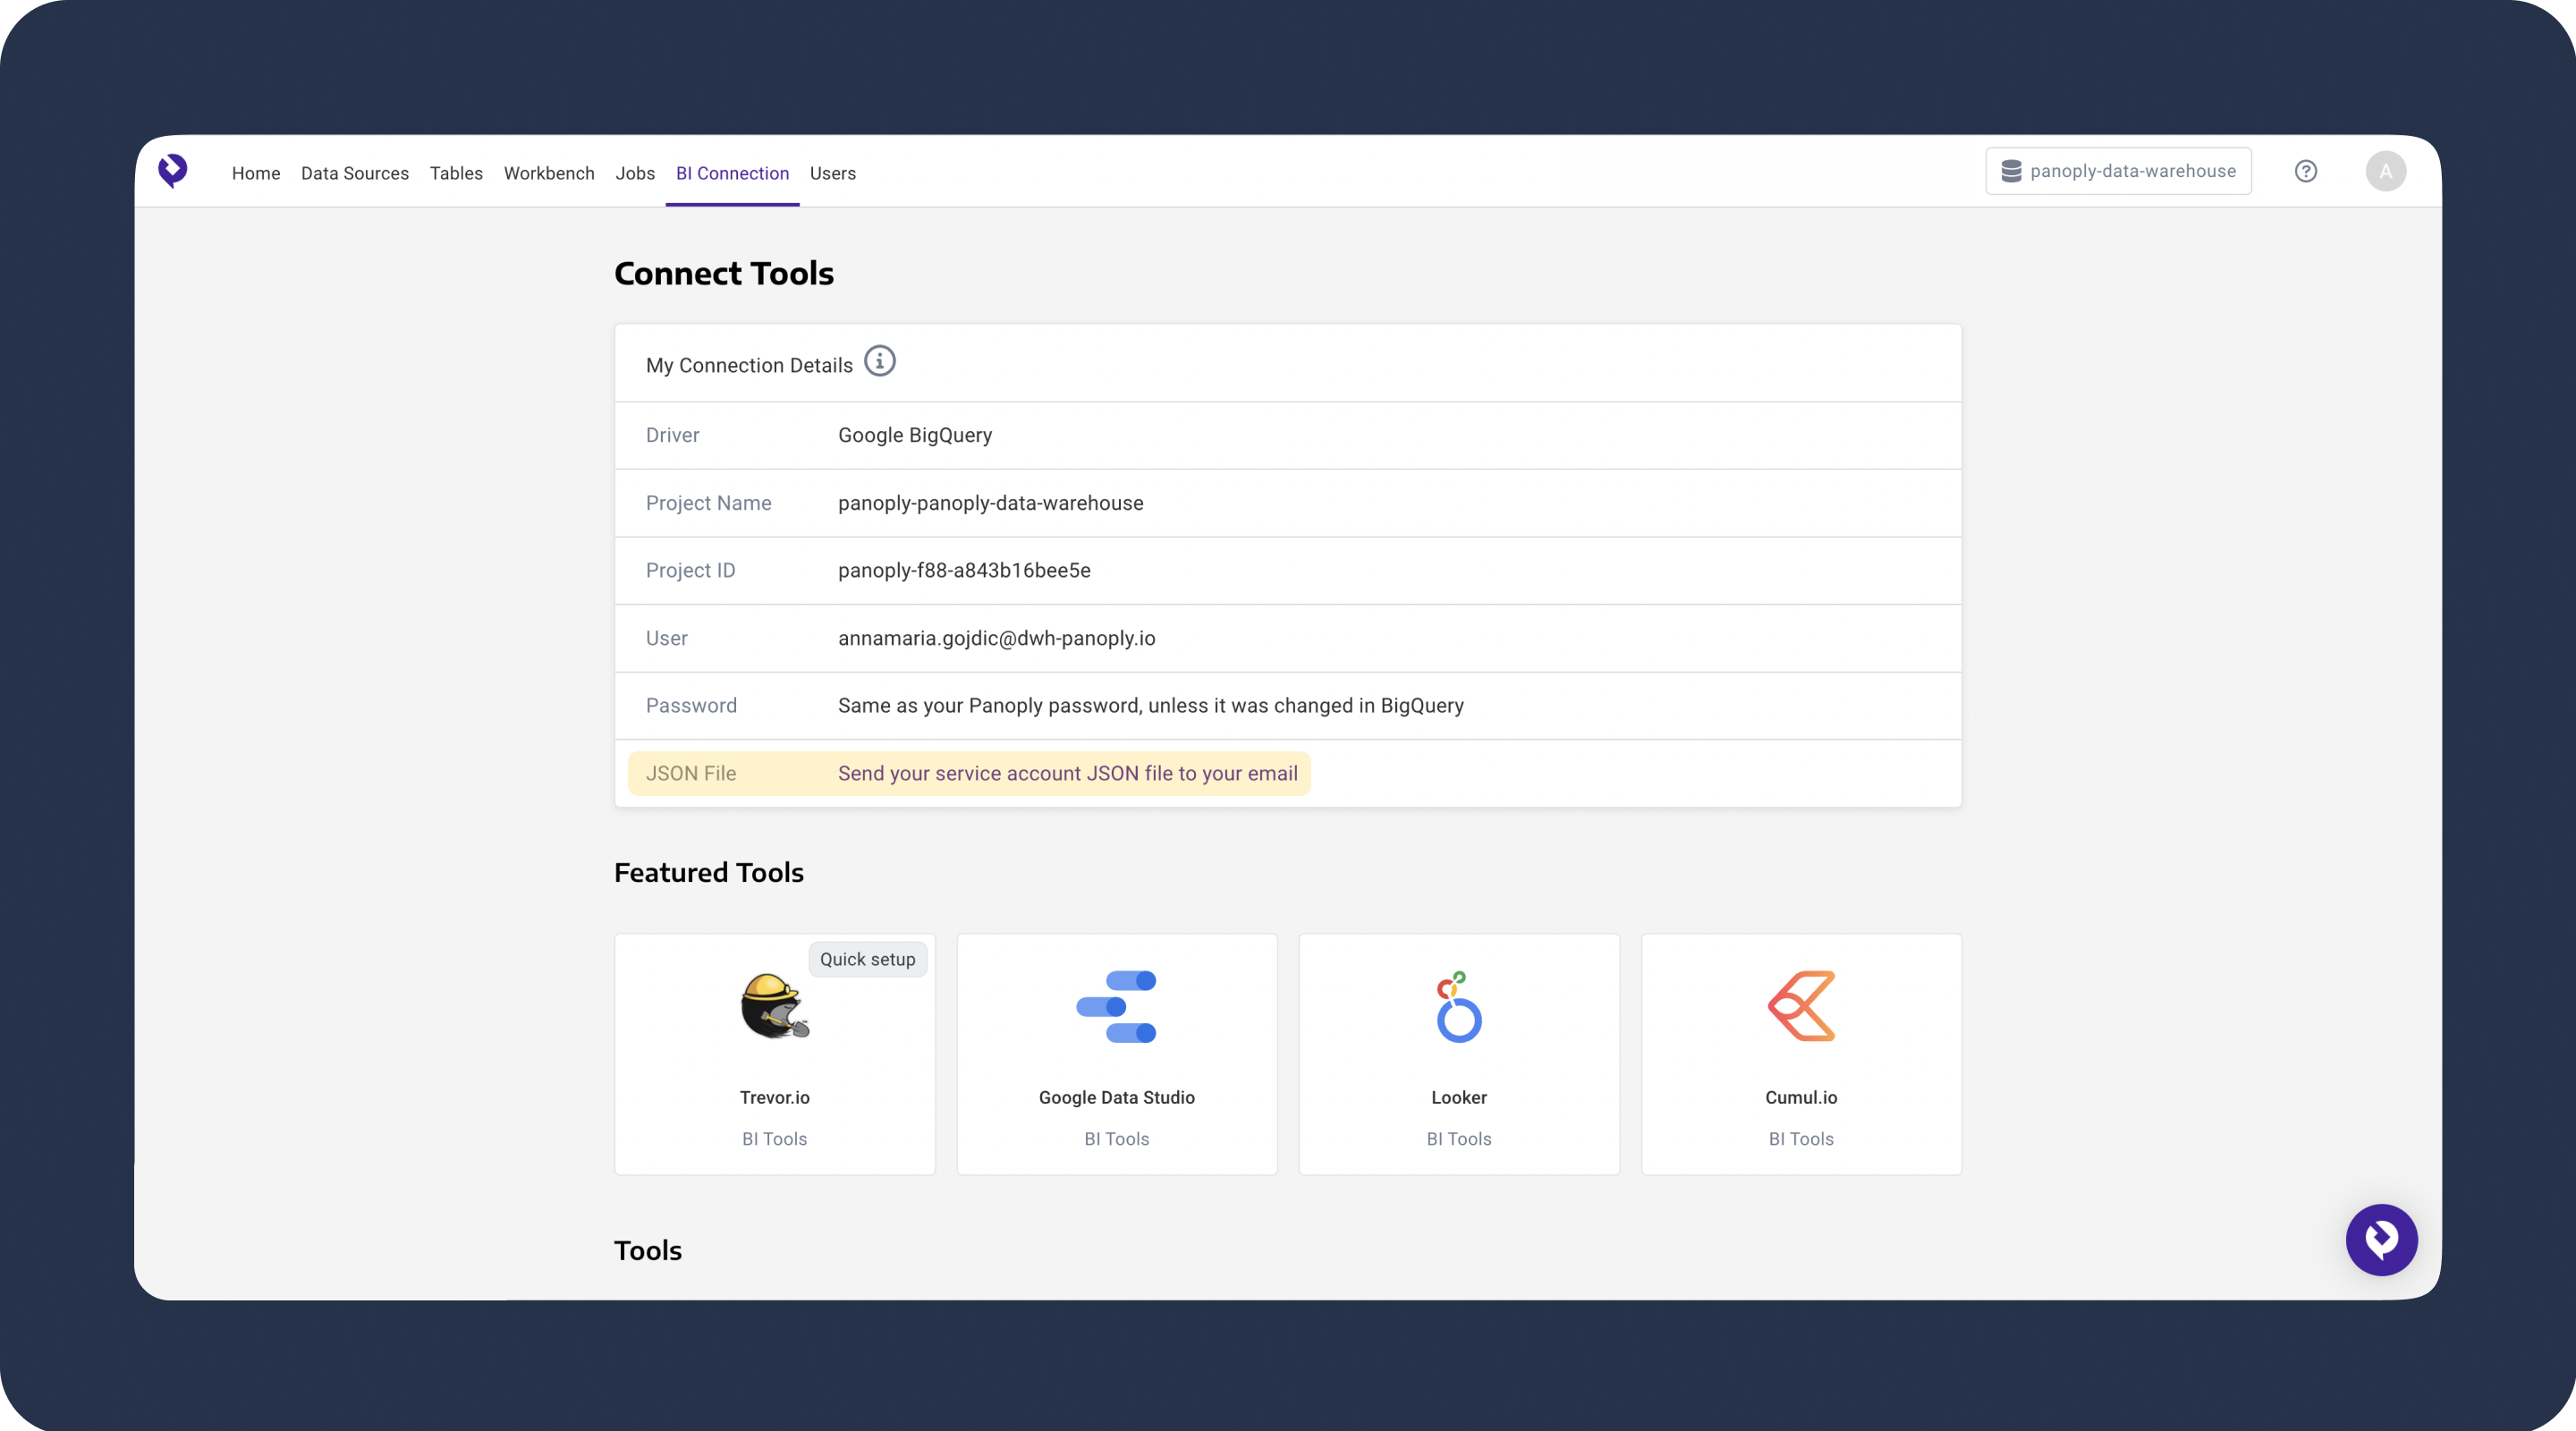
- Download the JSON file from your email.
In Dataddo
Add a new certificate and authorize your Panoply account in Dataddo.
- Go to the Certificates & Tokens page and click on Add Certificate.
- Select the Name of the certificate, choose RSA Private Key type, upload the JSON file and Save.
- In the Authorizers tab, click on Authorize New Service and choose Panoply.
- Select your certificate and Save.
Create a New Destination to Panoply
- Under the Destinations tab, click on the Create Destination button and select the destination from the list.
- Select your account from the drop-down menu.
- Select your Panoply project.
- Name your destination and click on Save to create your destination.
Need to authorize another connection?
Click on Add new Authorizer in drop-down menu during authorizer selection and follow the on-screen prompts. You can also go to the Authorizers page and click on Add New Service.
Create a Flow to Panoply
- Navigate to Flows and click on Create Flow.
- Click on Connect Your Data to add your source(s).
- Click on Connect Your Data Destination to add the destination.
- Choose the write mode and fill in the other required information.
- Check the Data Preview to see if your configuration is correct.
- Name your flow and click on Create Flow to finish the setup.