Microsoft Advertising is an online advertising platform that allows businesses to create and run advertising campaigns across Microsoft's search network, including Bing search engine and partner websites. It offers targeting options, ad creation tools, and performance tracking capabilities to help businesses reach their target audience and drive traffic, leads, and conversions through paid search advertising.
Refer to Microsoft's official documentation to see all available endpoints from the Microsoft Ads API.
Authorize Connection to Microsoft Advertising
To authorize this service, use OAuth 2.0 to share specific data with Dataddo while keeping usernames, passwords, and other information private.
- On the Authorizers page, click on Authorize New Service and select your service.
- If your email is used for more than one account, select the right type for your account as set in Microsoft Advertising: either Work or school account, or Personal account.
- Follow the on-screen prompts to grant Dataddo the necessary permissions to access and retrieve your data.
If you specify the incorrect account type, the setup test fails with the AADSTS650052 access error
How to Create a Microsoft Ads Data Source
- On the Sources page, click on the Create Source button and select the connector from the list.
- From the drop-down menu, choose your authorizer.Didn't find your authorizer?
Click on Add new Account at the bottom of the drop-down and follow the on-screen prompts. You can also go to the Authorizers tab and click on Add New Service.
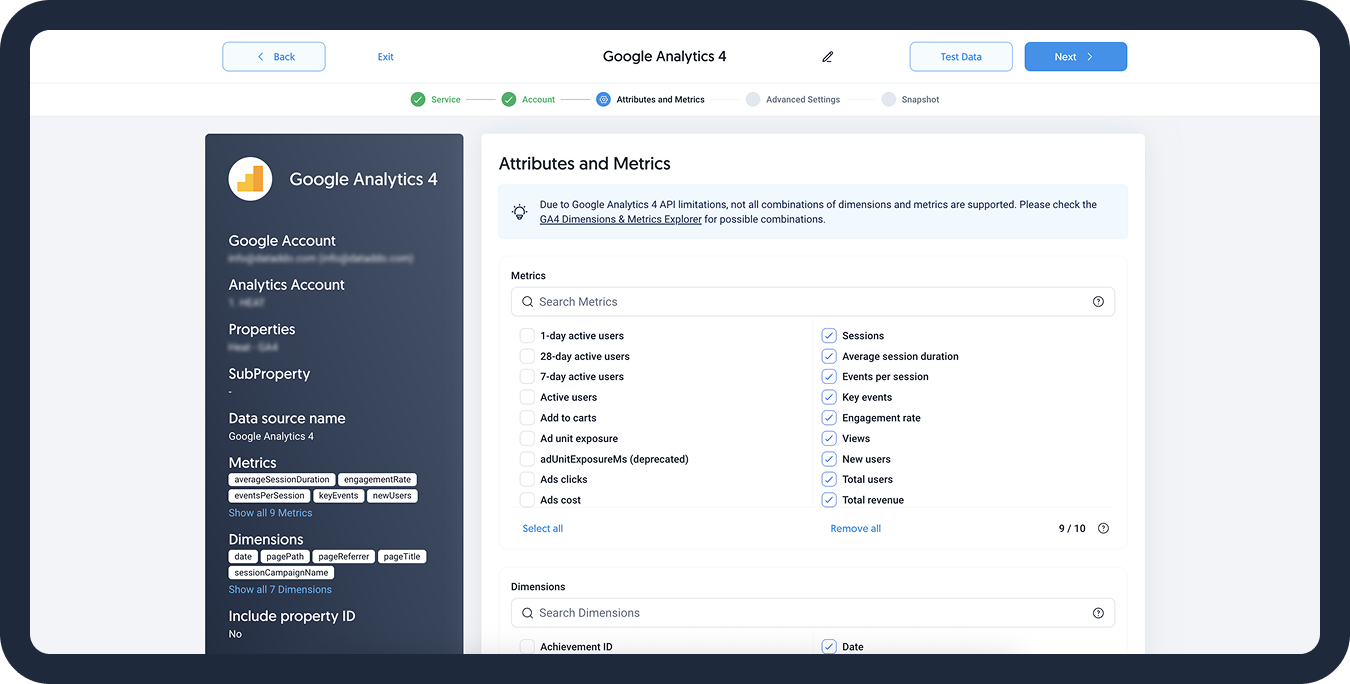
- Name your data source and select your metrics and attributes.
- [Optional] Configure your advanced settings. If you are unsure about how to proceed, we recommend skipping this step.
- Configure your sync frequency or set the exact synchronization time under Show advanced settings.DATADDO TIP
If you need to load historical data, refer to the Data Backfilling article.
- Preview your data by clicking on the Test Data button in the top right corner. You can adjust the date range for a more specific time frame.
- Click on Save and congratulations, your new data source is ready!
Limitations
Columns Restrictions
When submitting the following requests, AccountPerformanceReportRequest and AdGroupPerformanceReportRequest, there are some attribute and impression share performance statistics columns which are mutually exclusive.
For the whole list of restrictions, see Microsoft's official documentation.
Troubleshooting
Data Preview Unavailable
No data preview when you click on Test Data might be caused by an issue with your source configuration. The most common causes are:
- Date range: Try a smaller date range. You can load the rest of your data afterward using manual data load.
- Insufficient permissions: Please make sure your authorized account has at least admin-level permissions.
- Invalid metrics, attributes, or breakdowns: You may not have any data for the selected metrics, attributes, or breakdowns.
- Incompatible combination of metrics, attributes, or breakdowns: Your selected combination cannot be queried together. Please refer to the service's documentation to view a full list of metrics that can be included in the same data source.
Metric and Ad Recall Data Don't Match
The Reach and Recall metrics cannot be summed to get the totals for longer time periods. As these metrics measure the daily unique users who view your ad (= reach) or will remember the ad (=ad recall), it is not possible to get data for a specific time period and/or aggregate the data.
To avoid this, you can
- Get daily breakdowns: The daily values will match, but not when summed up over a longer time period.
- Extract data weekly or monthly: These weekly/monthly values will match.
Simply create a new source and a new flow with the particular breakdown (for example, a source and a flow with daily breakdowns/synchronizations).
Read more about the metrics, and why the data may not be matching here.
Performance Max Campaign Data
To extract data from your Performance Max Campaigns:
- Select the Campaign Performance Report report type. The data is only available using this report type.
- In the Attributes section, select all campaign-related fields
Base Campaign IDCampaign IDCampaign LabelsCampaign NameCampaign StatusCampaign Type
Related Articles
Now that you have successfully created a data source, see how you can connect your data to a dashboarding app or a data storage.
Sending Data to Dashboarding Apps
Sending Data to Data Storages
Other Resources