Personio is a human resources management and recruiting platform designed for small and medium-sized businesses. It provides tools for managing HR processes, including personnel administration, payroll, time tracking, and recruitment, in a centralized and integrated system.
Refer to our website for the list of metrics and attributes available in Dataddo.
Refer to Personio's official documentation to see all available endpoints from the Personio API.
Authorize Connection to Personio
In Personio
To authorize your Personio account, you will need your client ID and a client secret.
- In your Personio account, navigate to the Settings page and continue to API credentials.
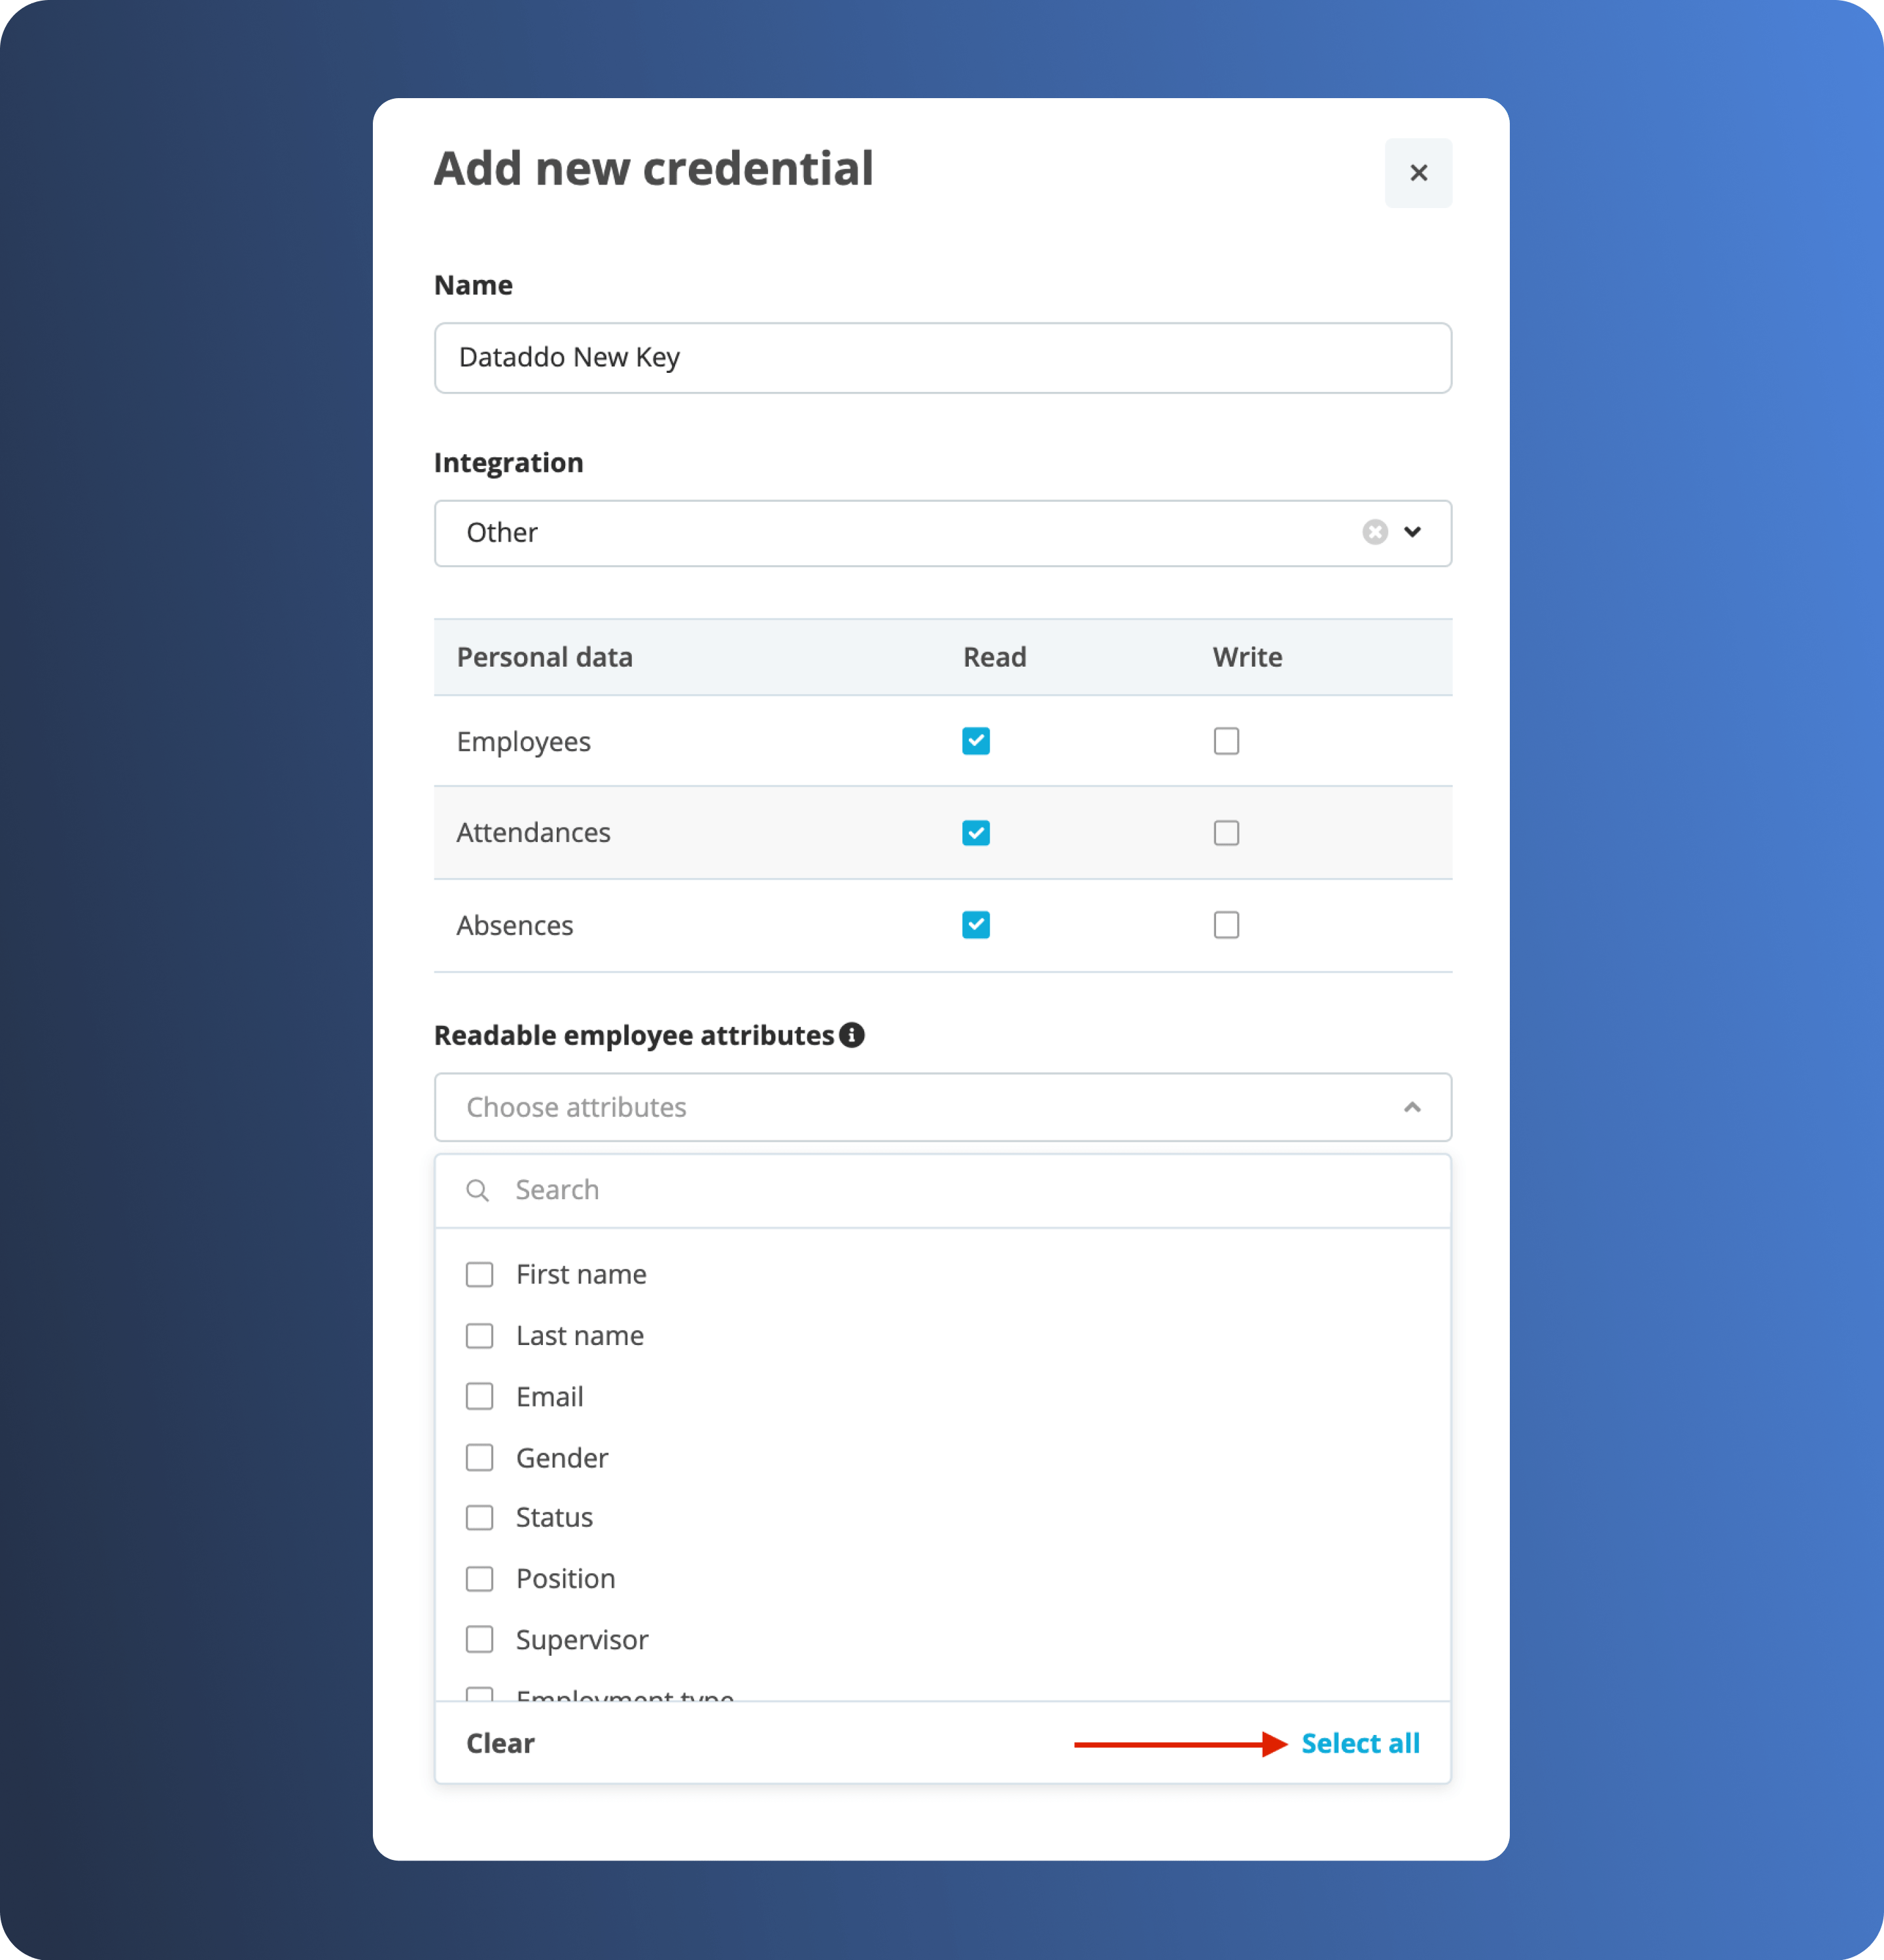
- Click on Generate new credential.
- Name the new API credential and check Read for all Personal Data.
- Select all the Readable employee attributes.

- Generate the new key and copy Your client ID and Your secret.
In Dataddo
- On the Authorizers page, click on Authorize New Service and select Personio.
- Fill in the following fields:
- Client ID: Your Personio client ID.
- Client Secret: Secret to your client ID.
- Rename your authorizer for easier identification and click on Save.
How to Create a Personio Data Source
- On the Sources page, click on the Create Source button and select the connector from the list.
- Select your dataset and click on Next to continue.DATADDO TIP
If you are not sure which dataset you need but know the metrics and attributes, use the Search by Name or Attribute function.

- From the drop-down menu, select your authorizer.Didn't find your authorizer?
Click on Add new Account at the bottom of the drop-down and follow the on-screen prompts. You can also go to the Authorizers tab and click on Add New Service.
- Name your data source and select your metrics and attributes. Keep in mind that metrics and attributes depend on the selected dataset.
- Configure your sync frequency or the exact synchronization time under Show advanced settings.DATADDO TIP
If you need to load historical data, please refer to the Data Backfilling article.
- Preview your data by clicking on the Test Data button in the top right corner. You can adjust the date range for a more specific time frame.
- Click on Save and congratulations, your new data source is ready!
Troubleshooting
Data Preview Unavailable
No data preview when you click on Test Data might be caused by an issue with your source configuration. The most common causes are:
- Date range: Try a smaller date range. You can load the rest of your data afterward via manual data load.
- Insufficient permissions: Please make sure your authorized account has at least admin-level permissions.
Related Articles
Now that you have successfully created a data source, see how you can connect your data to a dashboarding app or a data storage.
Sending Data to Dashboarding Apps
Sending Data to Data Storages
Other Resources