In the final step of our quickstart tutorial, we will guide you through creating a data flow.
A data flow connects and streamlines the transfer of data from your data source to a data destination, making your data management automated and accurate.
Creating a data flow can be done in the following ways:
- First, create a data source and connect a data destination. Then proceed to this step.
- Or just simply start your flow creation and create both the source and the destination as you go!
Proceed to the tutorial depending on your destination. Create a new data flow to connect your data to:
Create a Data Flow: Dashboarding App as a Destination
- Navigate to Flows and click on Create Flow.
- Click on Connect Your Data to add your sources. Here, you can blend or union your data.
- Click on Connect Your Data Destination and navigate to the Dashboarding Apps tab to add your destination.
- Check the Data Preview to see if your data is correct.
- Name your flow and click on Create Flow.
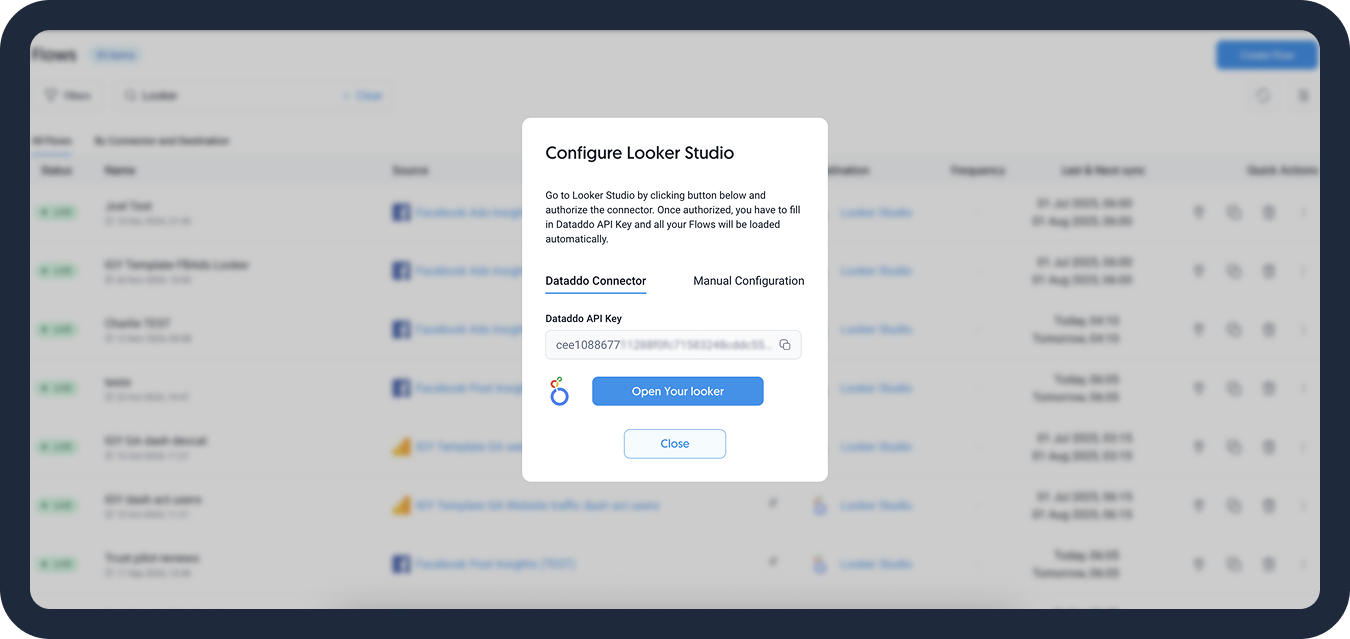
A window with configuration details will pop up. Follow the instructions to finish the setup in your dashboarding app.
If you need to revisit the configuration details, simply go to the Flows tab and click on the power outlet icon.
Well done, your data flow has been created! You can now explore the rest of our documentation.
Create a Data Flow: Data Storage as a Destination
- Navigate to Flows and click on Create Flow.
- Click on Connect Your Data to add your source(s).
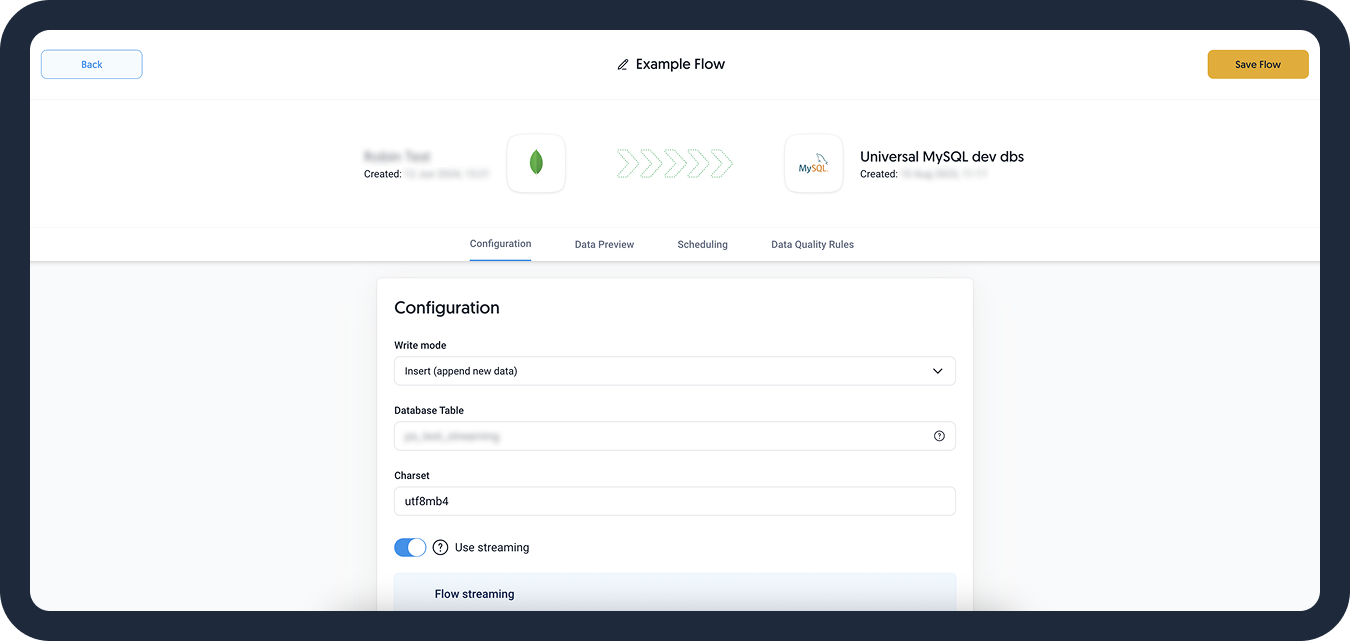
- Click on Connect Your Data Destination to add the destination.
- Choose the write mode and fill in the other required information.
- Check the Data Preview to see if your configuration is correct.
- Name your flow and click on Create Flow to finish the setup.
Well done, your data flow has been created! You can now explore the rest of our documentation.
Create a Data Flow: Application as a Destination
- Navigate to Flows and click on Create Flow.
- Click on Connect Your Data to add your sources. Here, you can blend or union your data.
- Click on Connect Your Data Destination and navigate to the Applications tab to add your destination.
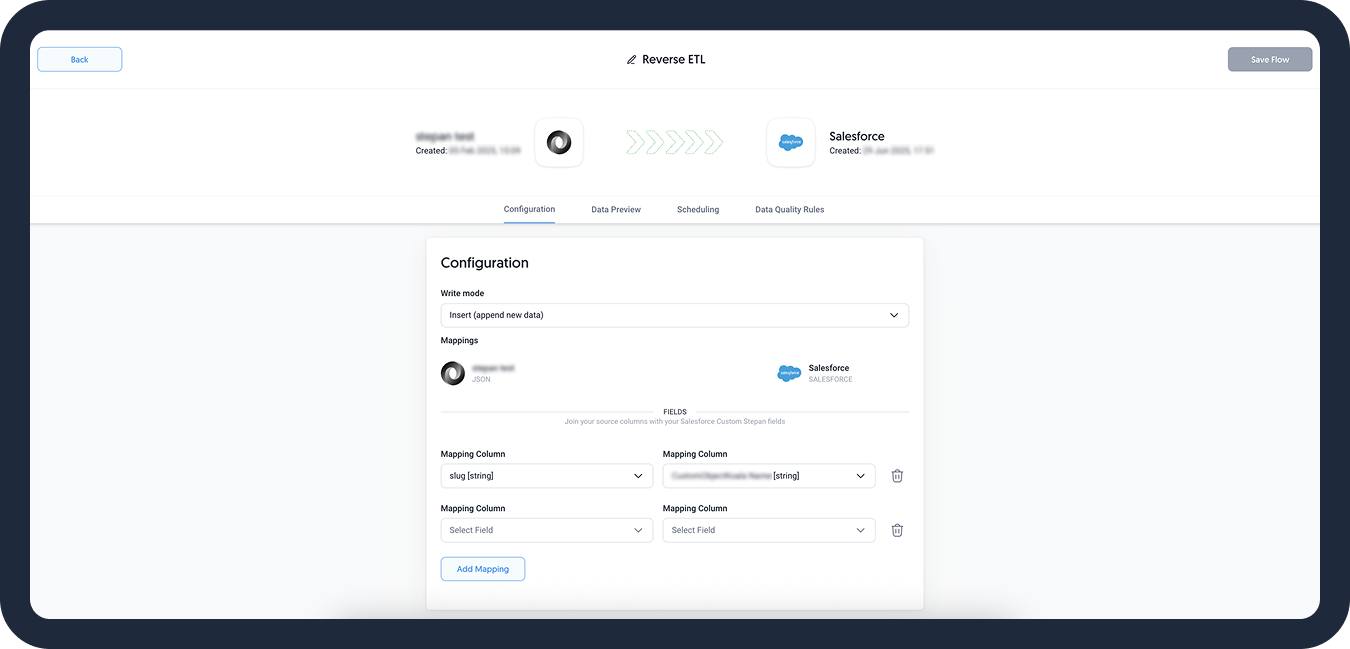
- Select your write mode.
- Choose a unique identifier that will be used in mapping the data to the application.DATADDO TIP
Define mapping columns based on the selected write mode. If you choose to upsert your data, make sure to include at least 1 mapping column that includes your unique ID. We recommend using the Dataddo Hash.
For data insertion, you will be asked to include specific pre-defined fields in order to insert the rest of the data.
- [Optional] Go to the Scheduling tab to change your sync schedule. If you are unsure about how to proceed, we recommend skipping this step.
- Check the Data Preview to see if your configuration is correct.
- Name your flow and click on Create Flow.
Well done, your data flow has been created! You can now explore the rest of our documentation.
What's Next?
If you still need some time to get used to Dataddo, revisit our quickstart tutorials any time:
For deeper dives into connector configurations and additional tips, check out our how-to guides:
Other Resources
As you embark on your data journey with Dataddo, here are some resources that can further enhance your experience and knowledge:
- Explore our core concepts to familiarize yourself with the terms used commonly used in Dataddo.
- Enroll in the Dataddo Academy to expand your understanding of the platform through our insightful video tutorials.
- Learn how to efficiently manage account and team members for a seamless workflow experience.
- Become a part of our Slack Community, a hub for data enthusiasts where you can find support and easy access to a plethora of resources.